
390 Duke Chain and Sprocket Swap
Chain maintenance is one of the key regular maintenance items for every rider out there (well those of us with a chain-driven bike 😀). A complete chain swap however is done more infrequently, and some riders leave that to their professional mechanic. That’s fine and good, but once you understand the procedure and have some tools even people with two left hands like me can do it!
General procedure
Here’s the main steps:
- Loosen front sprocket nut
- Break the original chain
- Remove the original chain
- Replace the front sprocket
- Remove the rear wheel
- Replace the rear sprocket
- Mount rear wheel
- Cut new chain to length
- Attach new chain
- Attach master link
- Adjust chain to spec
So quite a few steps to be sure!
Pre-requisites & tools
You’ll definitively need some tools for this job - a Dremel and chain tool are highly recommended. Here’s a list of stuff that I used:
- Rear stand
- Socket wrench (+ appropriate sockets - check your manual/repair guide or eyeball what you need)
- Torque wrench
- Medium strength thread locker
- New chain
- New front and rear sprocket (optional but highly recommended!)
- Long-life grease
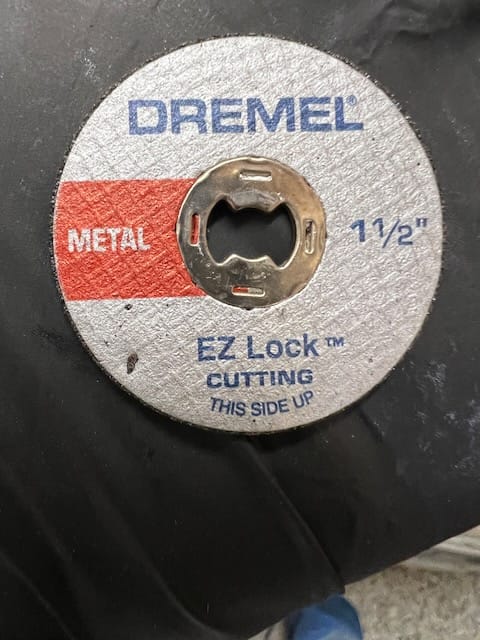
- Dremel with metal cutting attachment
- Chain Break/Press/Rivet tool (mine is from Motion Pro)
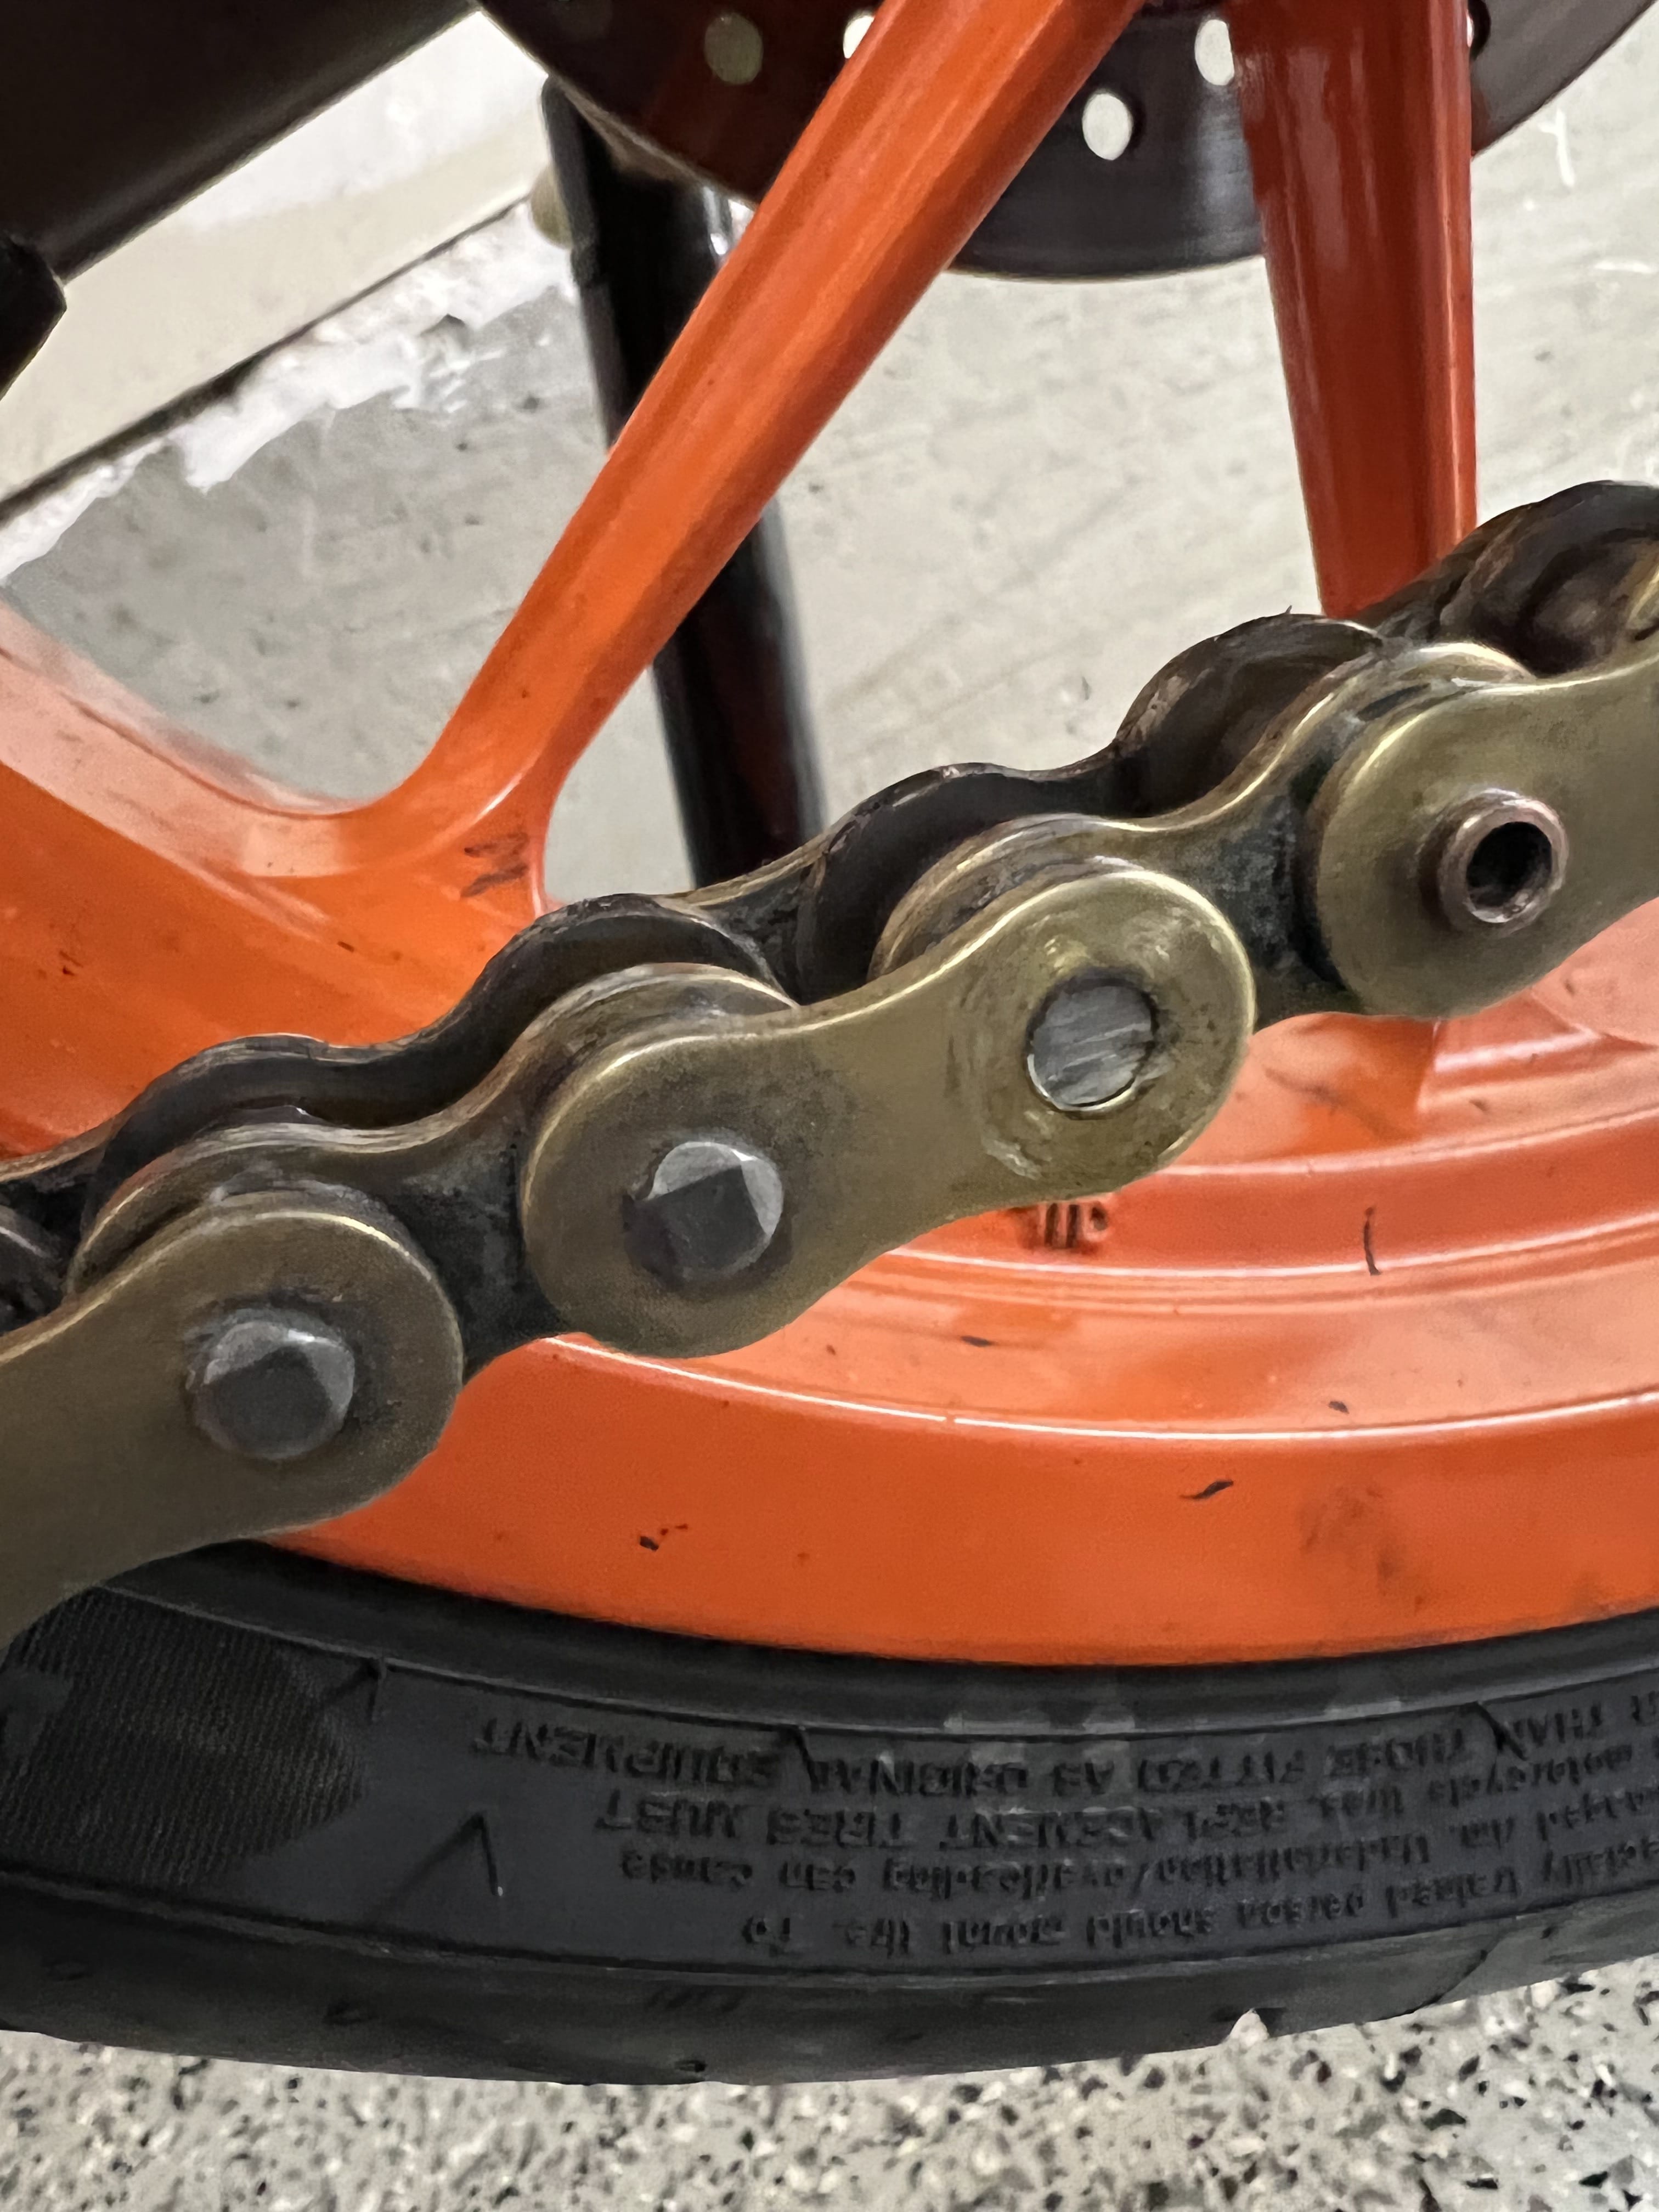
Understanding modern sealed chains
You’ve most likely heard of O-ring, X-ring, and various other *-ring type chains - odds are your bike has one of these modern kinds of chains. The great benefit of these “sealed” type chains is that the factory-installed lubricant is sealed in by the o/x/z rings, meaning that they take less maintenance than unsealed type chains. The drawback is that sealed chains are more expensive.
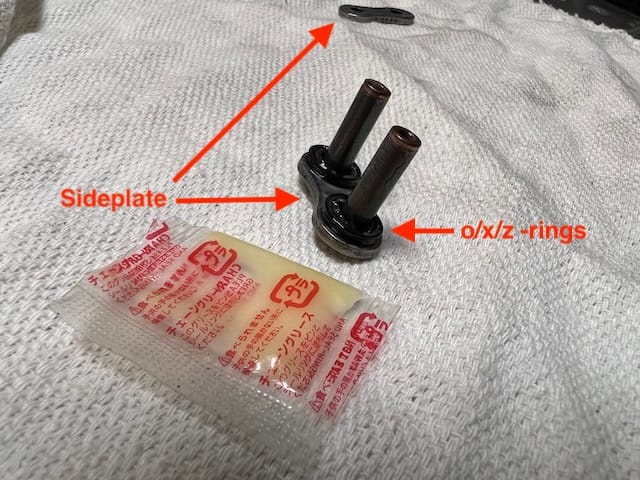
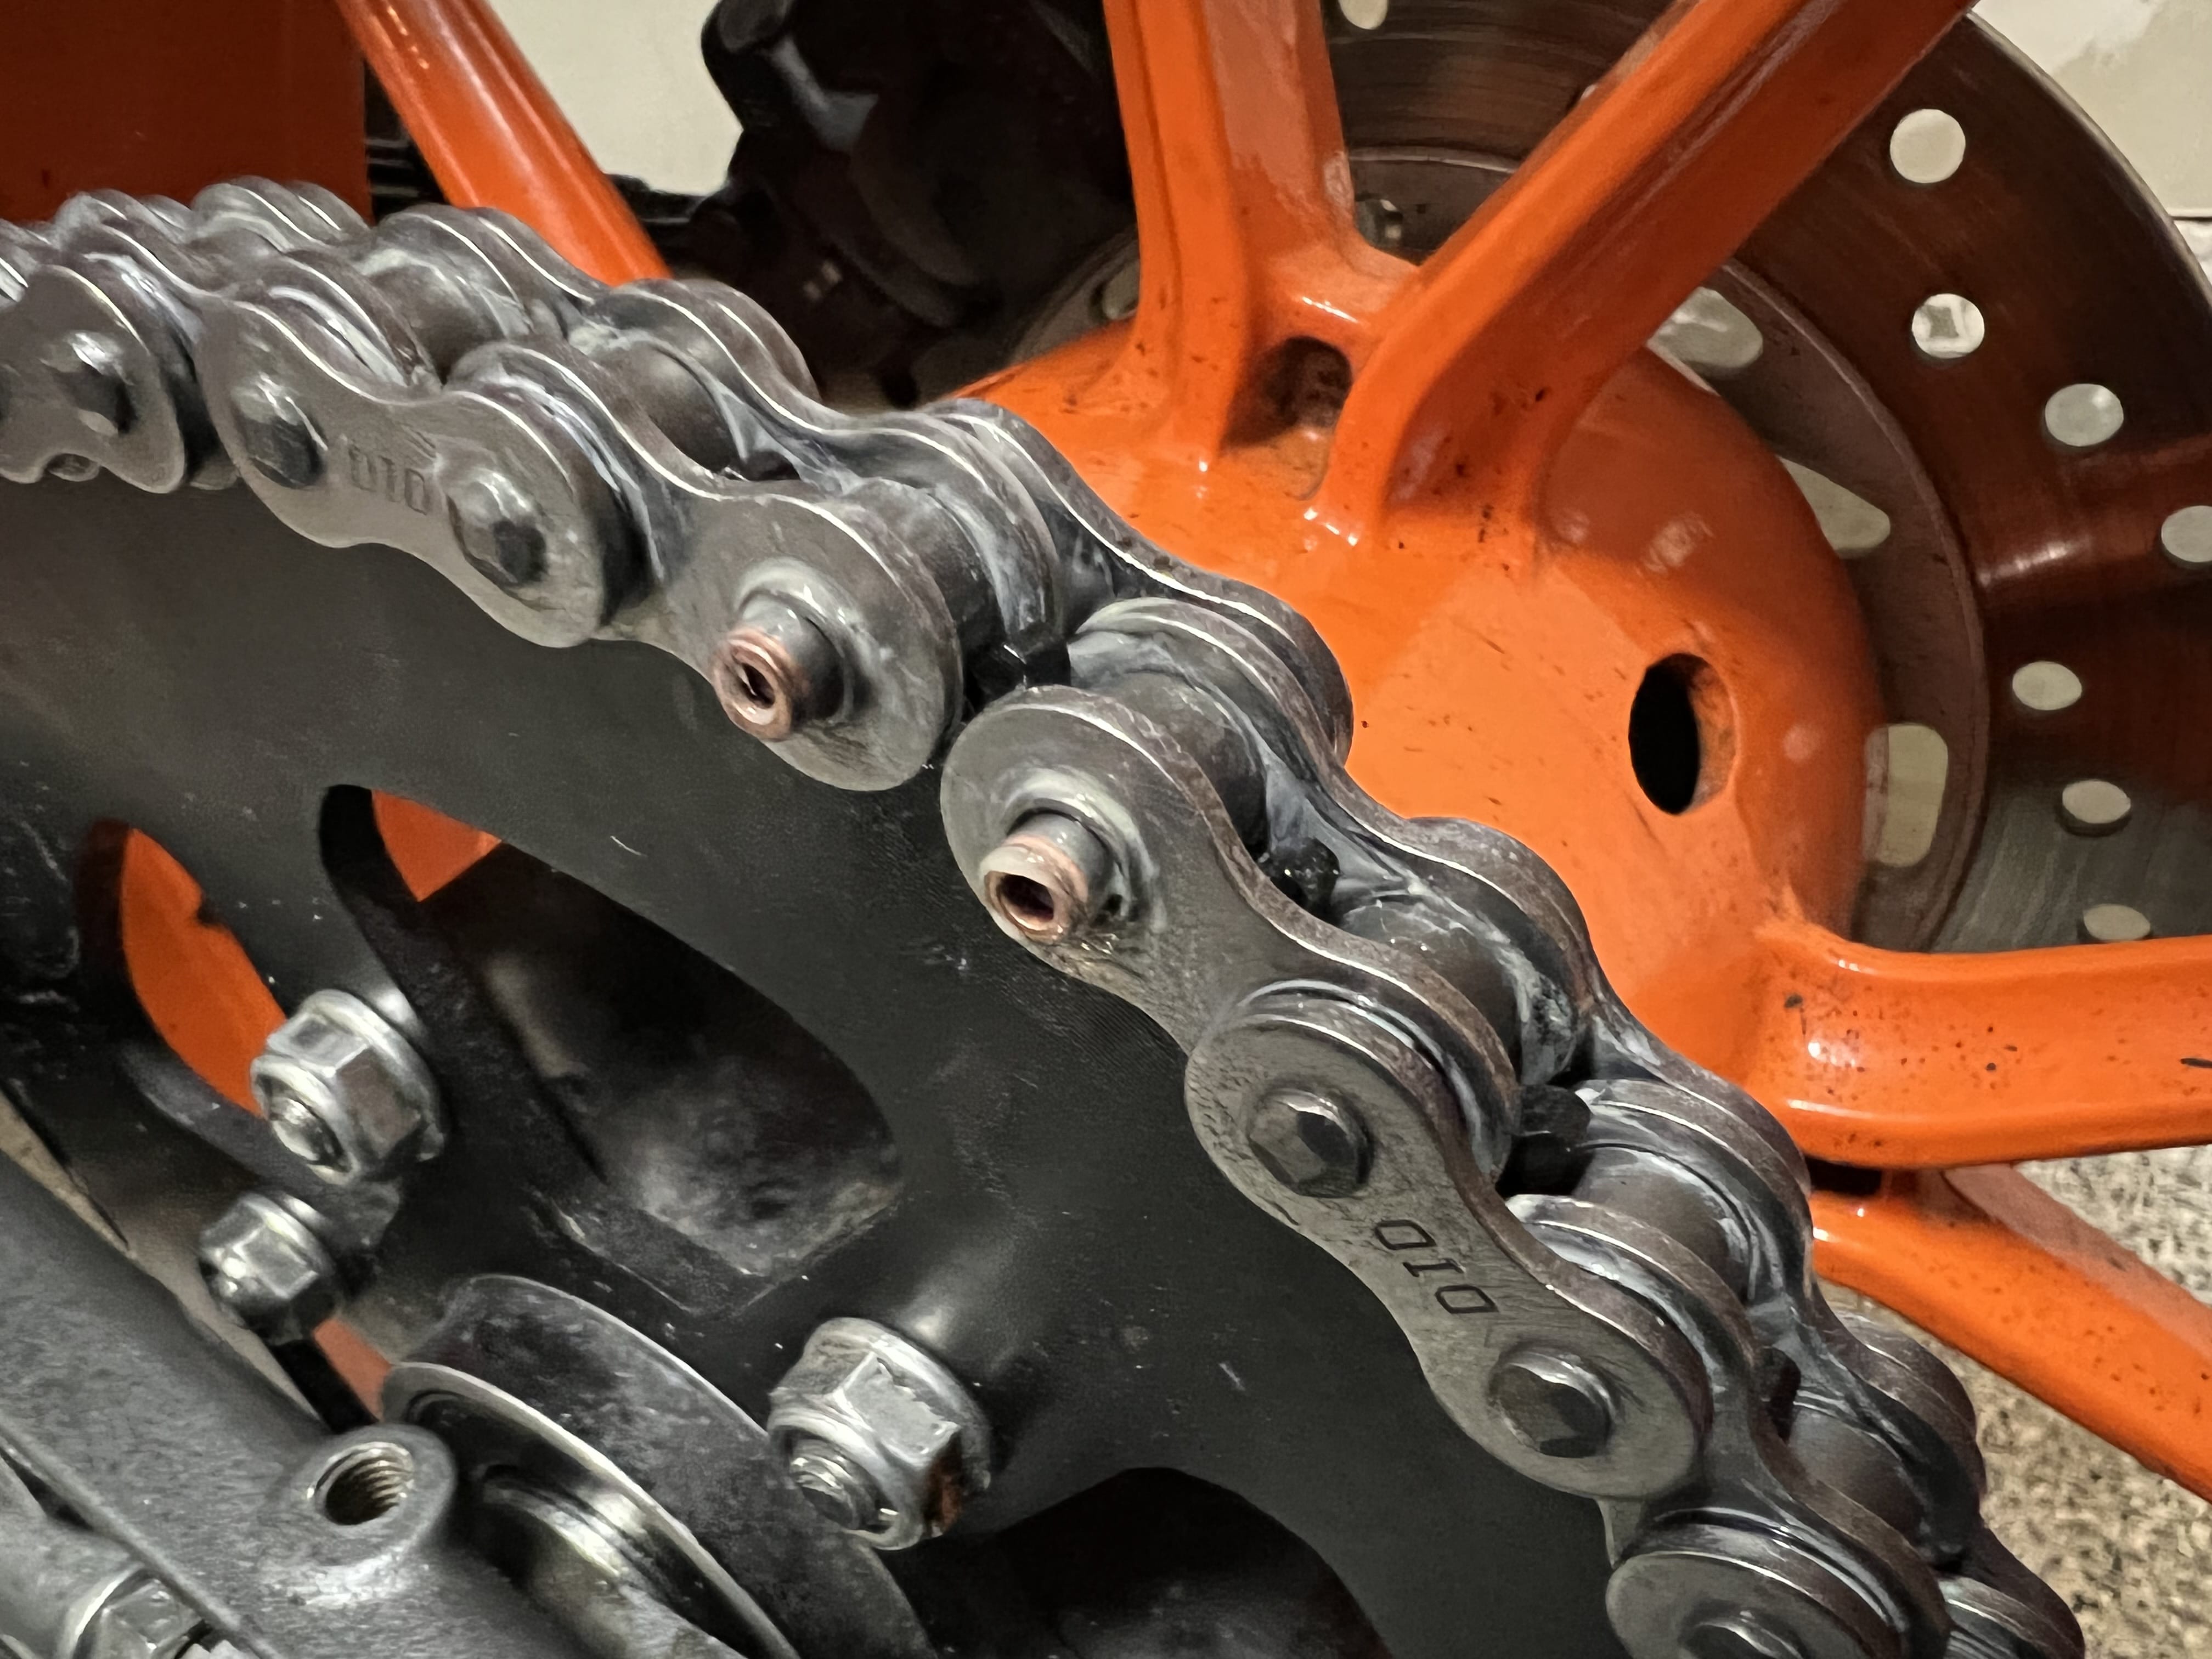
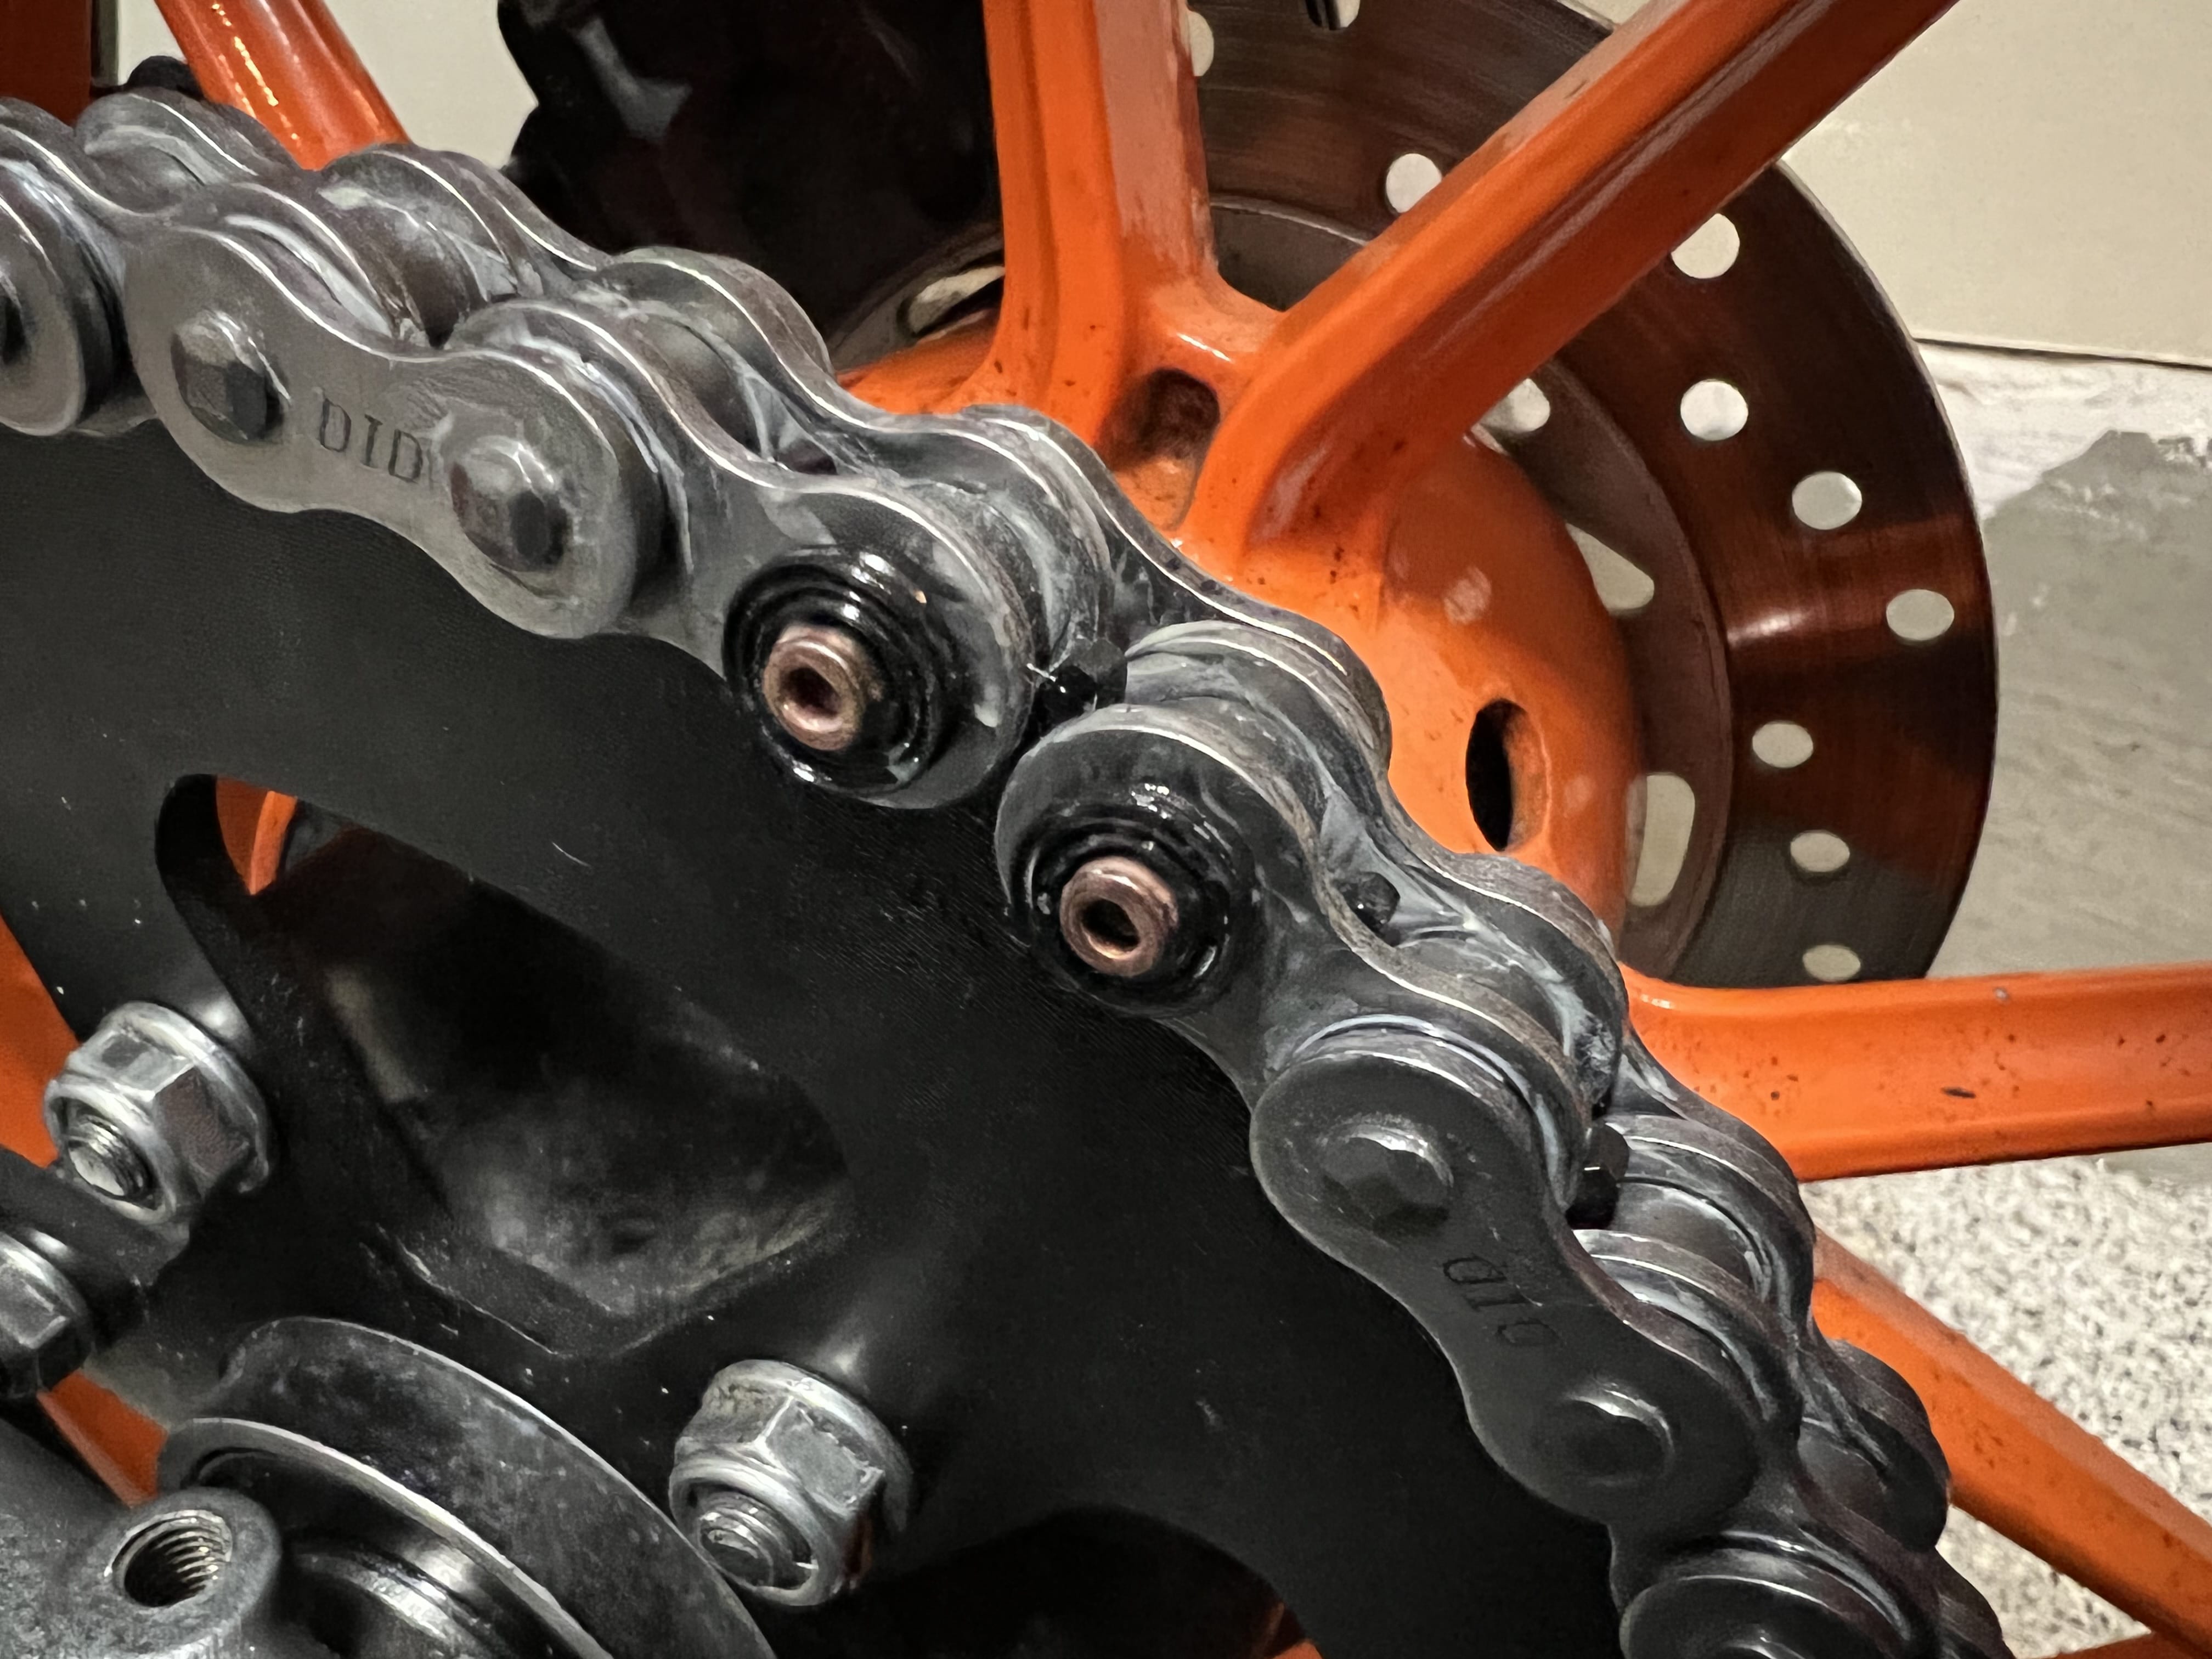
In the above figure of a master link, observe that lubricant has been applied to the x-rings as well as the pins. On standard factory links this is the same, but you won’t see the body of the pins since there is a roller above them. The same will be true for the master link as soon as we’ve inserted it into place.
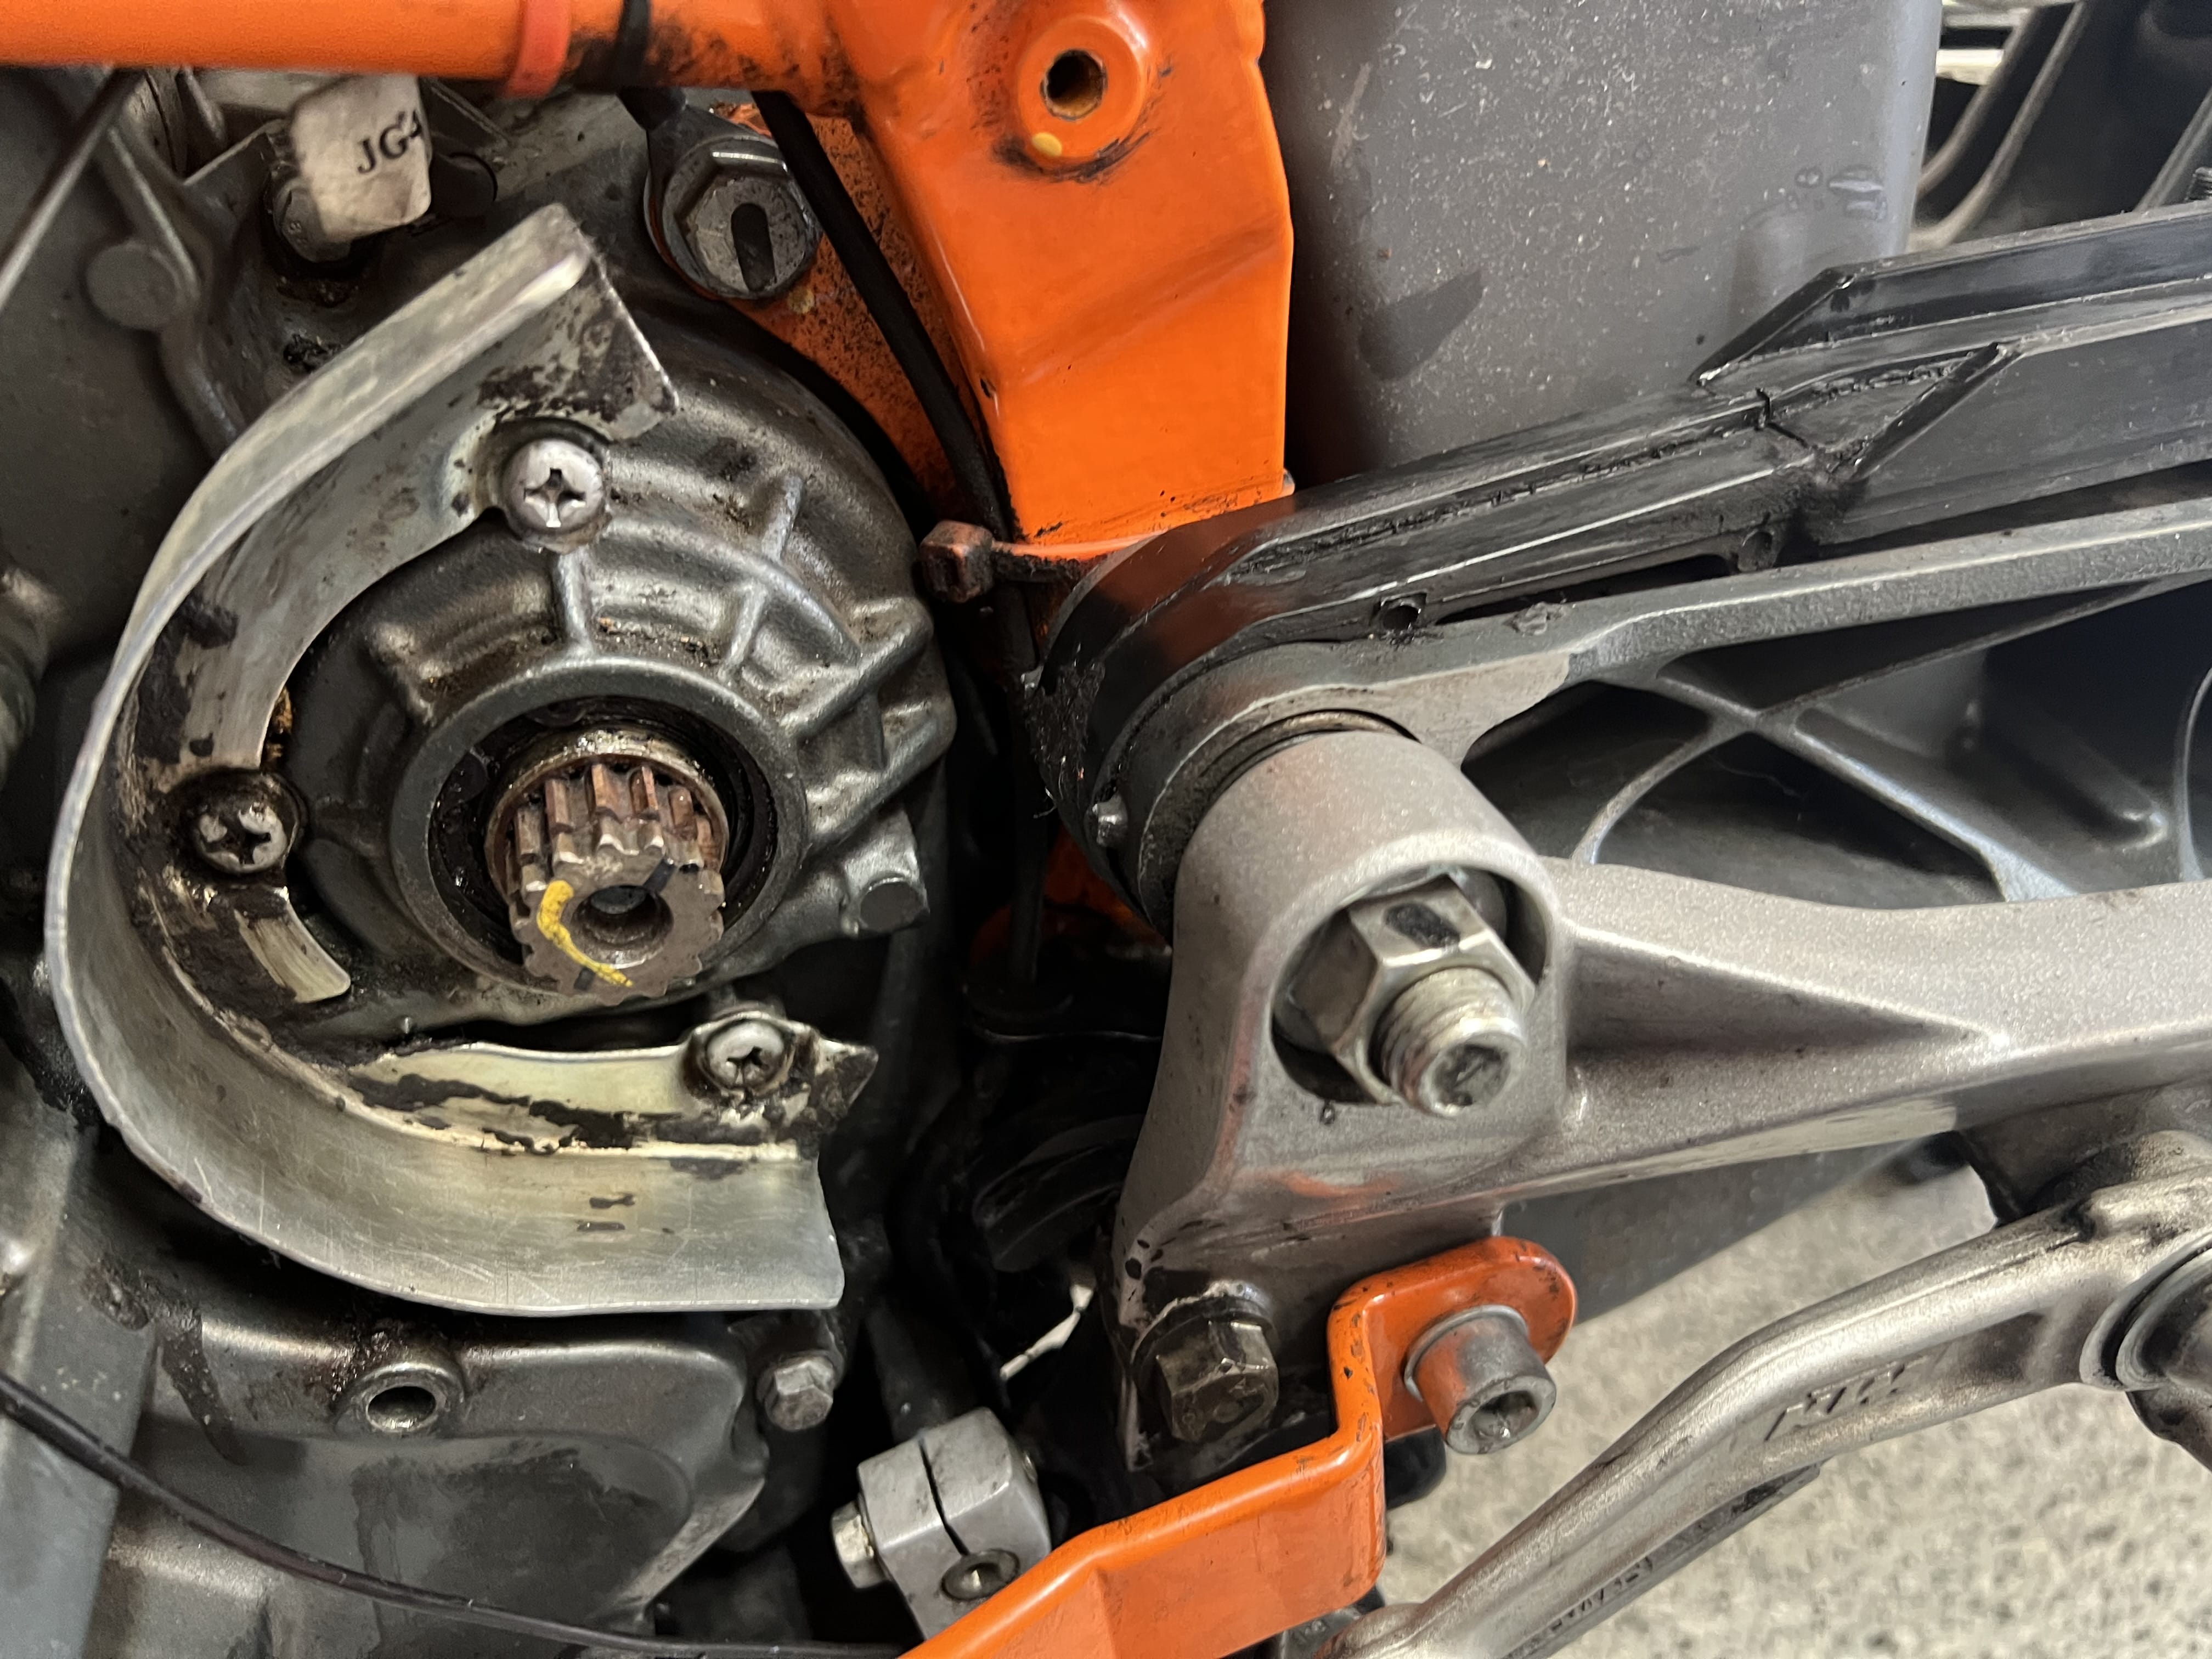
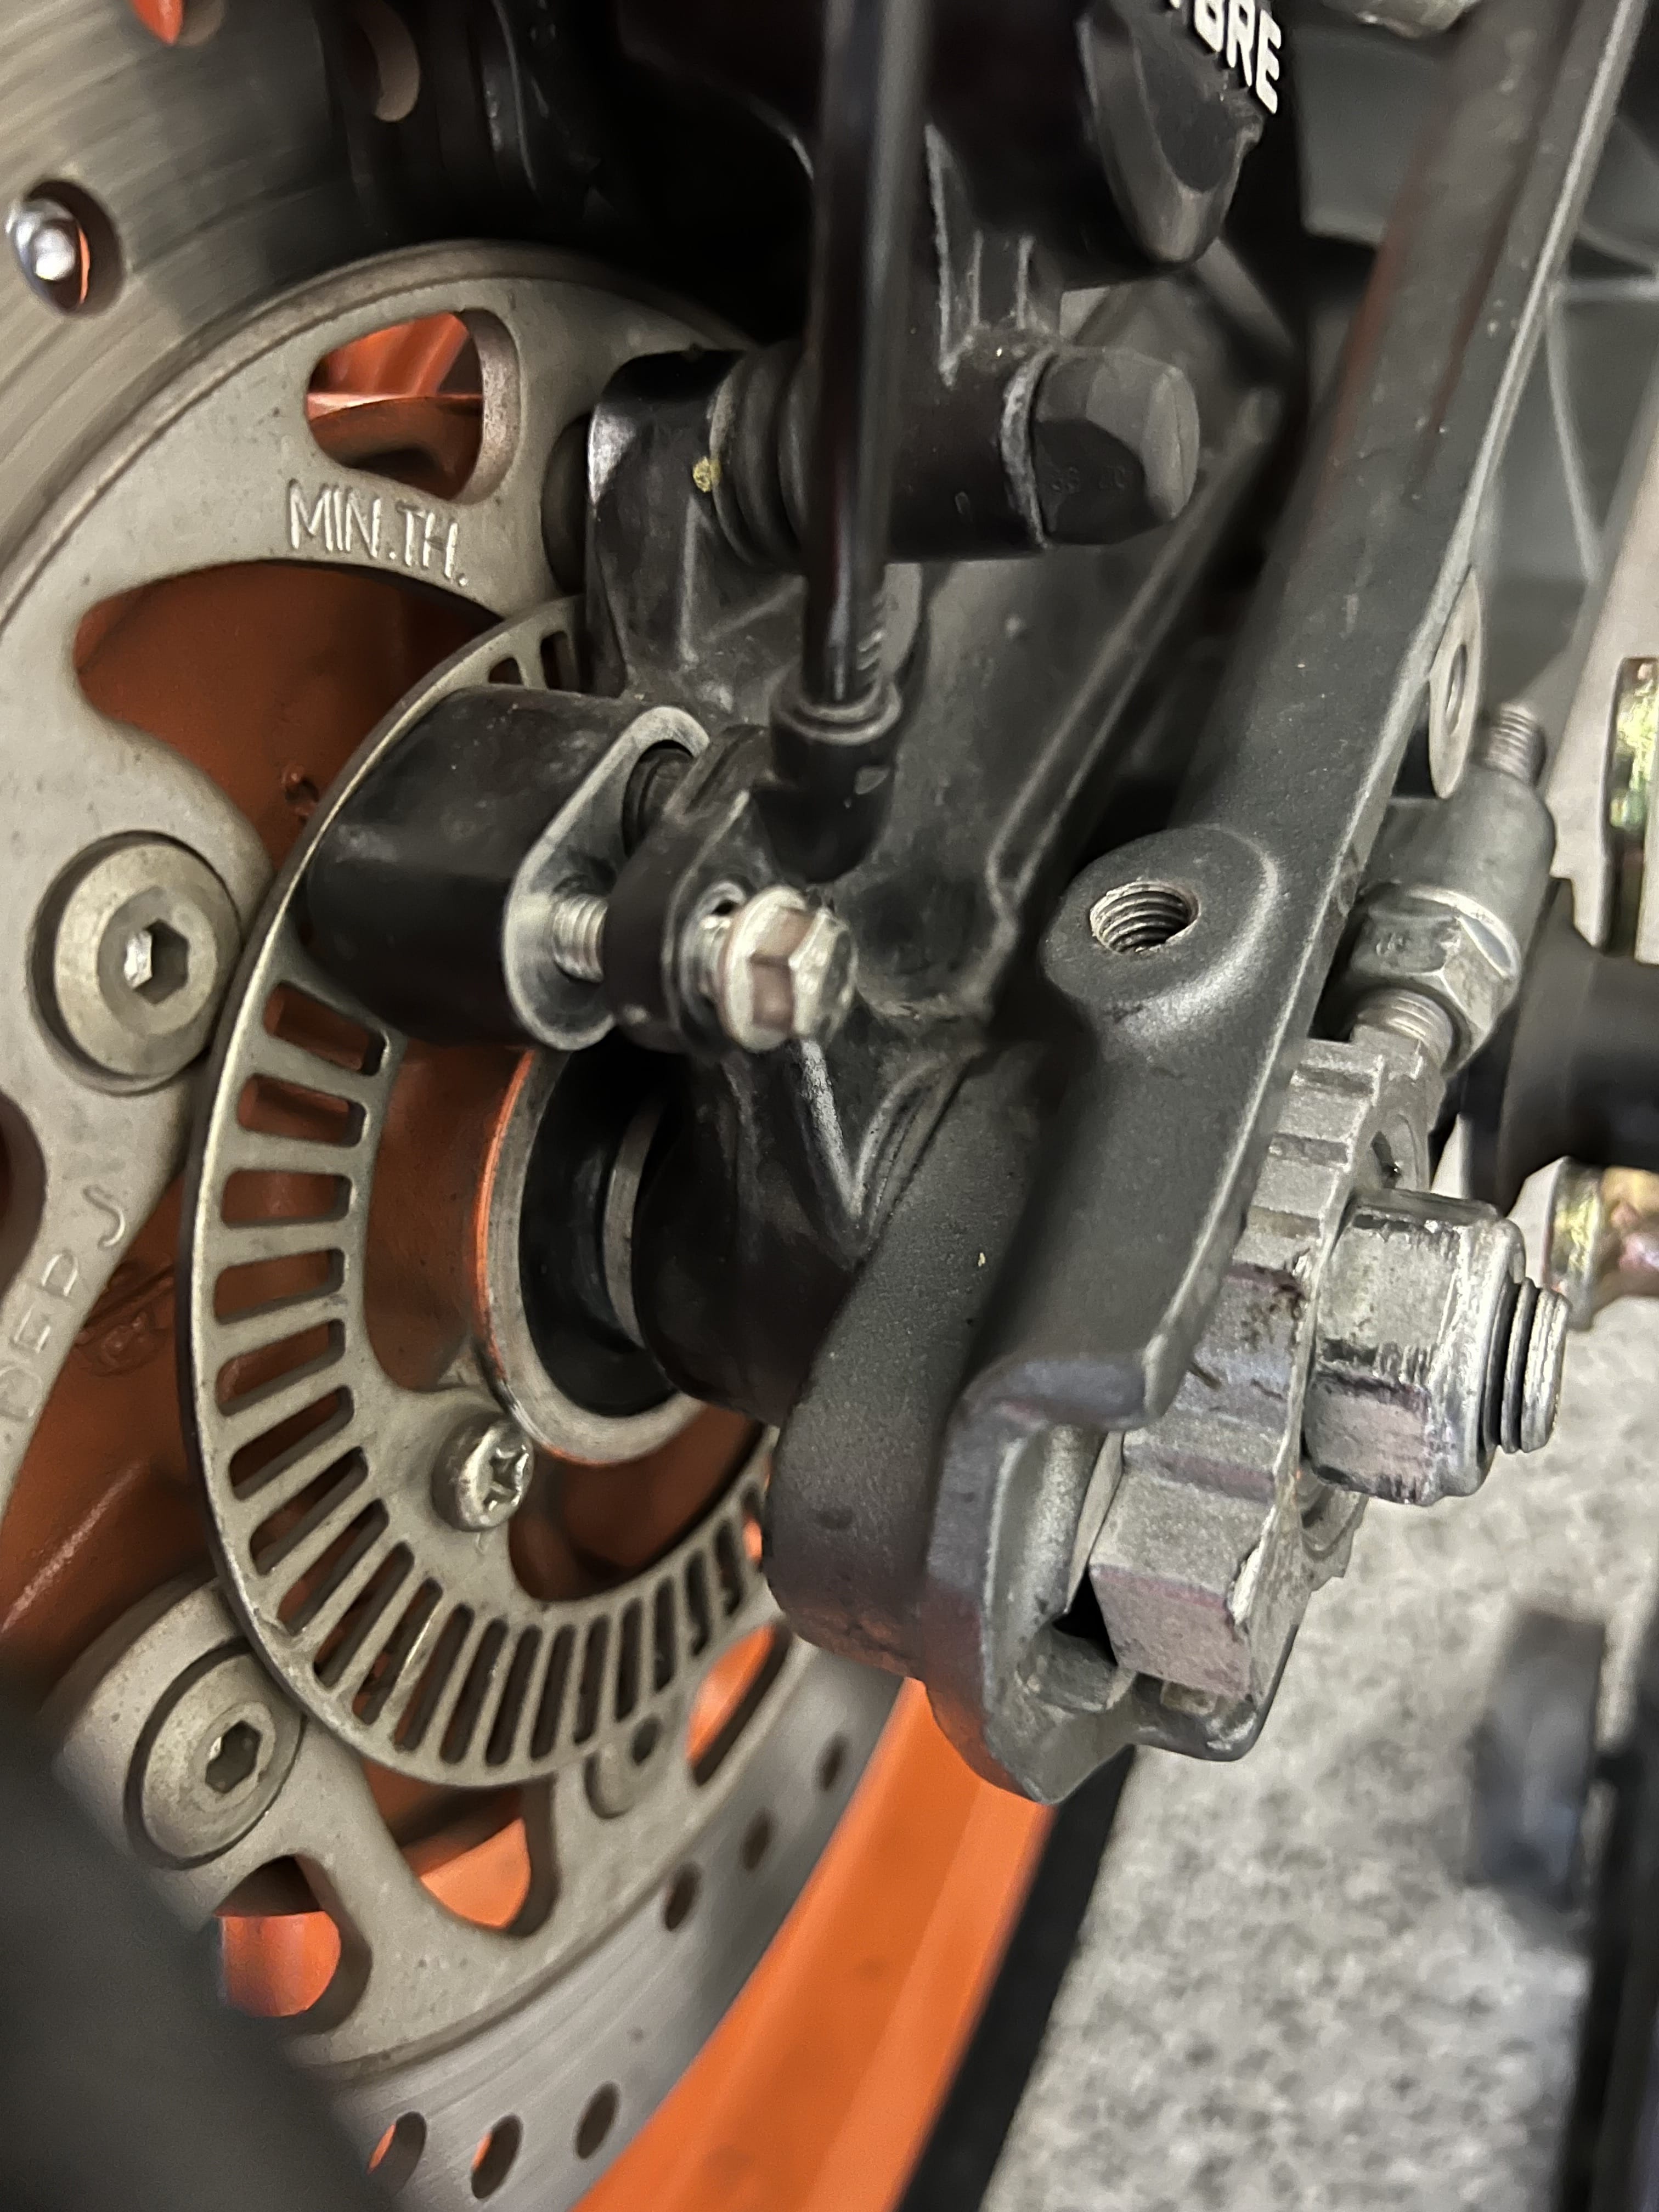
1) Loosen front sprocket nut
This step will differ from bike to bike. Some have a gigantic nut that will need to be loosened with a large breaker bar (if you’re unlucky). It’s important to loosen the front sprocket nut before removing the chain as we will use the chain to prevent the sprocket from turning. On the 390 Duke I got a little lucky though and the front sprocket is fastened by a clip held in place to the sprocket by two bolts which are not torqued down a lot. Regardless if your bike has a large front nut or a clip like mine does, a trick to prevent the front sprocket from rotating is to hold down the rear brake with some force - which prevents the rear wheel from turning an in turn also prevents the front sprocket from turning. It should be possible to do this by reaching around the bike with one hand, but if you need to use a breaker bar or impact wrench then having a buddy for this step is good.

On the Duke one simply has to remove the two bolts on either side of the shaft as shown above, slightly rotate the retaining bracket and it out.
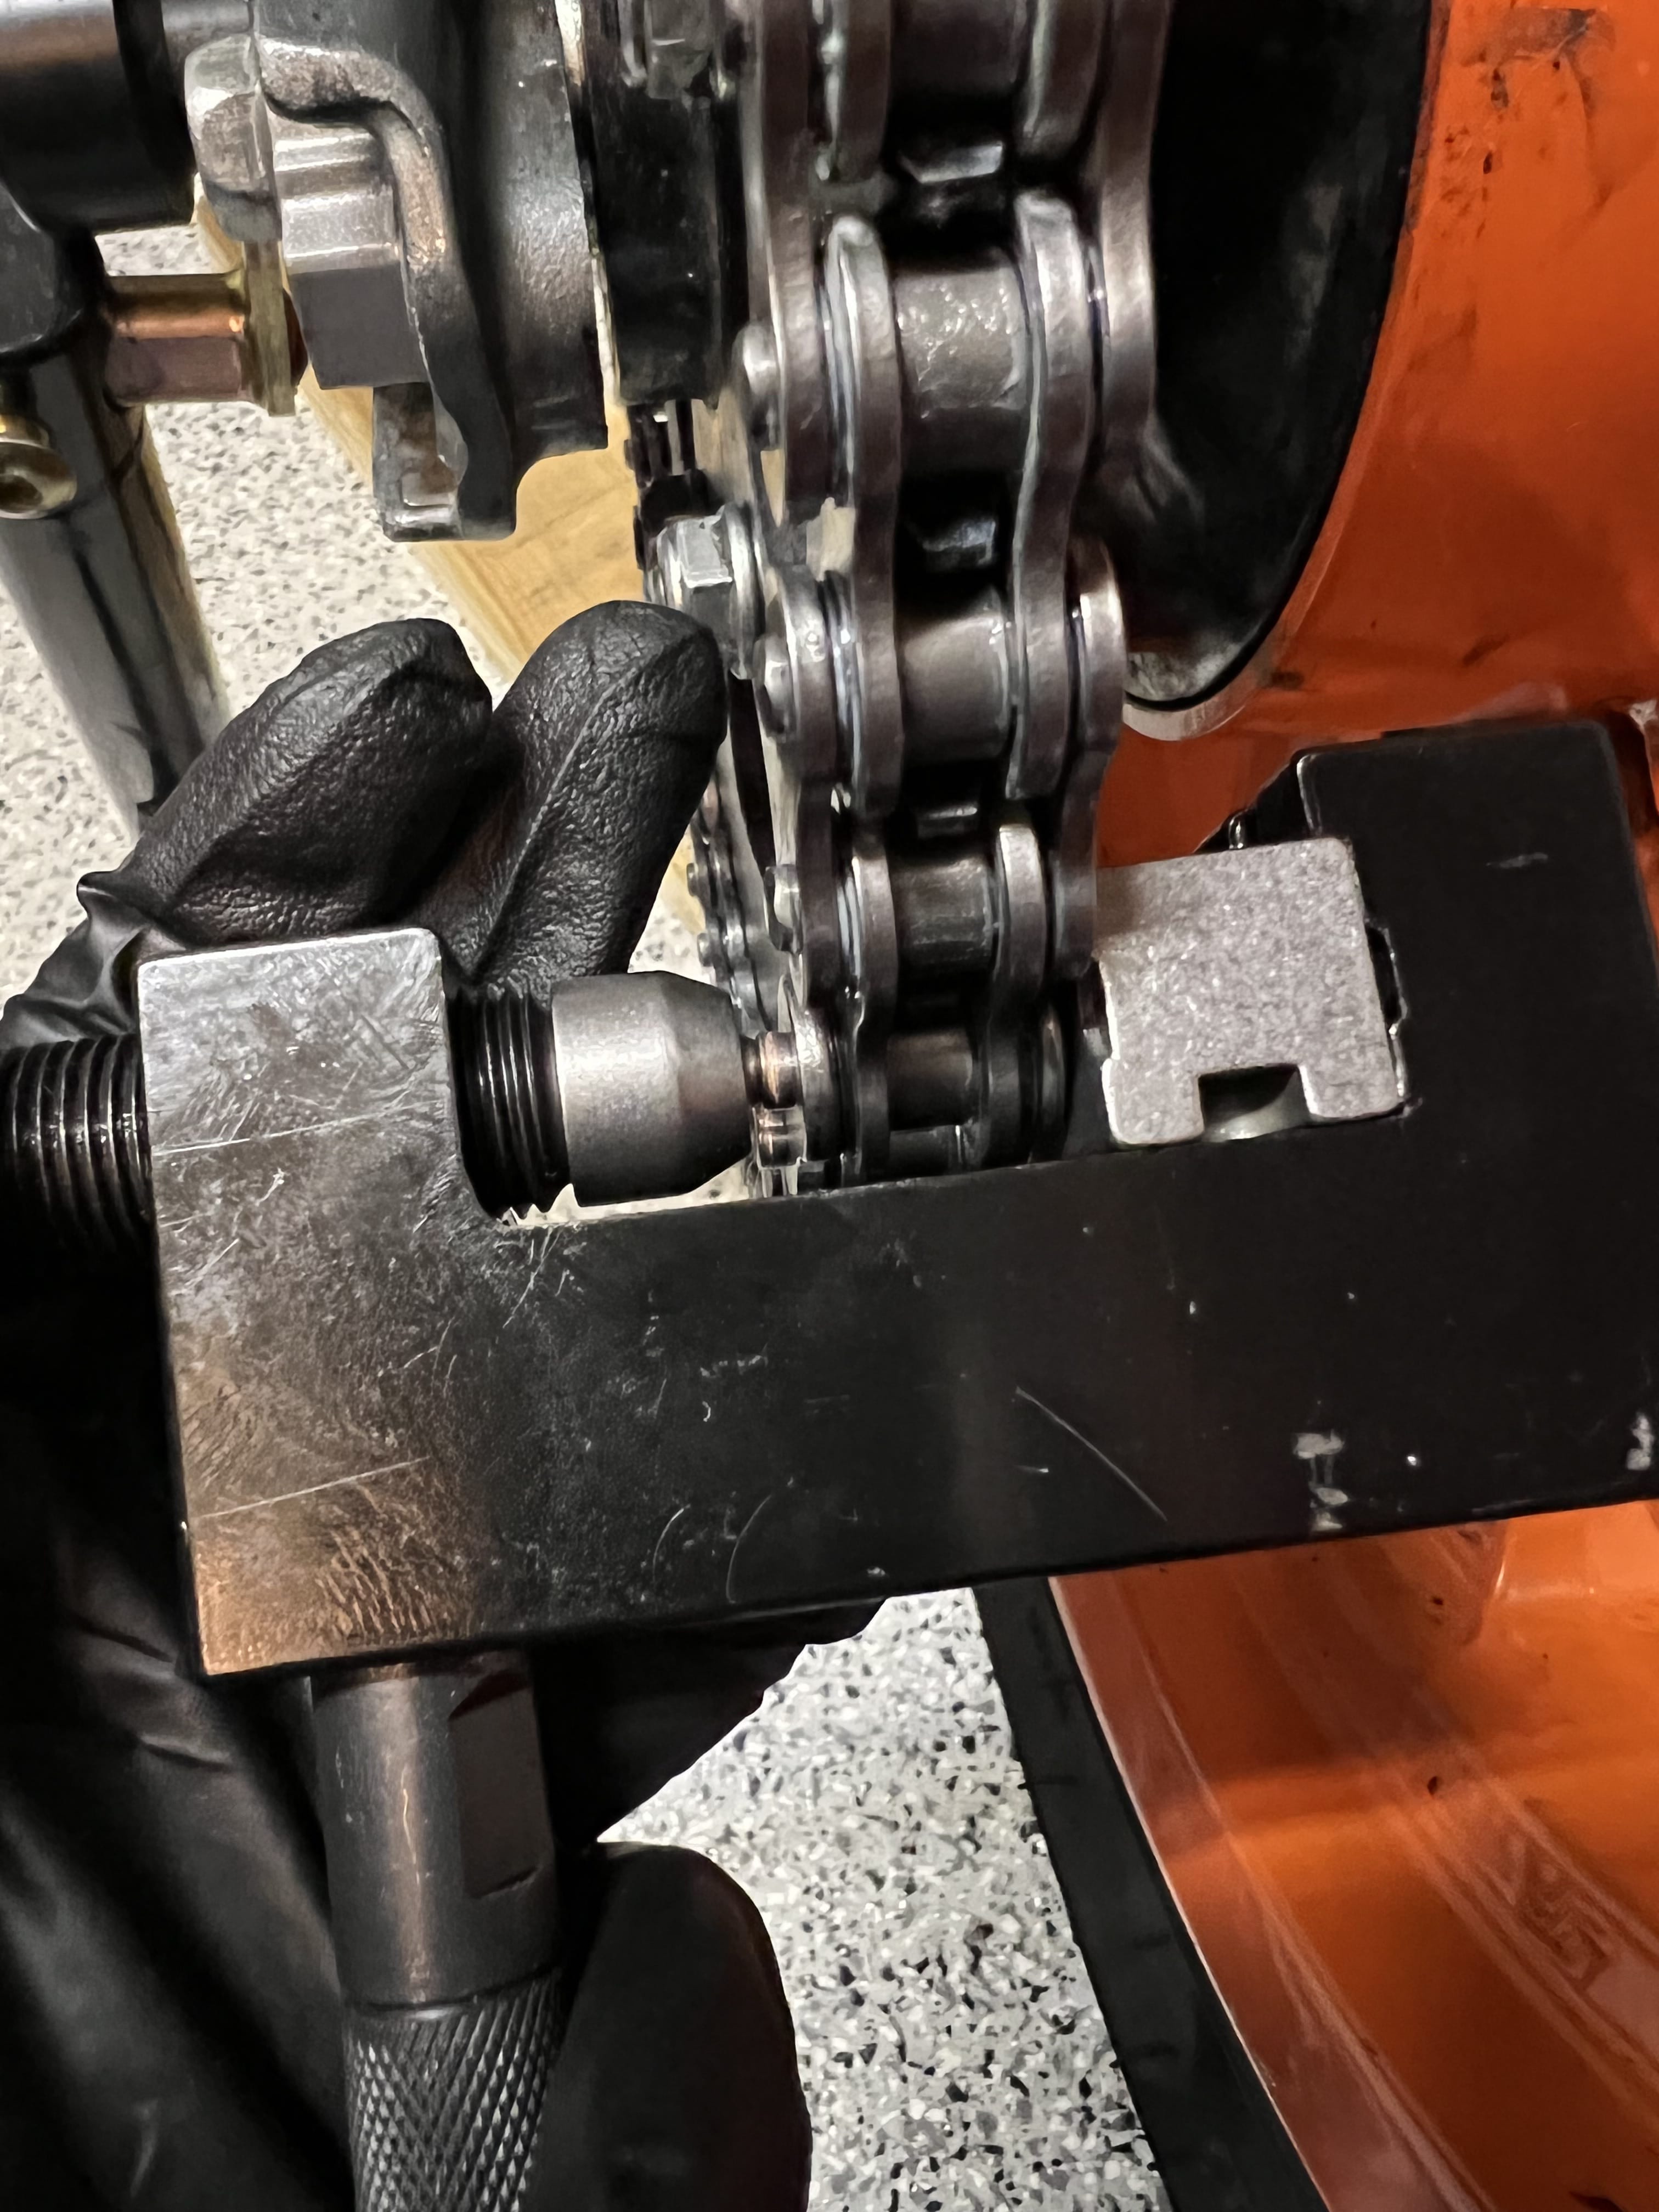
2) Breaking the original chain
It’s very helpful to have a chain tool and a Dremel. To help the chain breaker do its work you can use a Dremel with a metal cutting attachment in order to grind down the head of the pin to press.

Note that in most cases the chain breaking tool also needs to be assembled depending on the desired function (check the instructions for your tool). The Motion Pro tool I used comes pre-assembled in the “Break” configuration as seen in the gallery above. The core idea is that, using sheer force, we will push a pin out and through the chain allowing it to be separated. The grinding down from the previous step will help the chain breaking tool do its work.
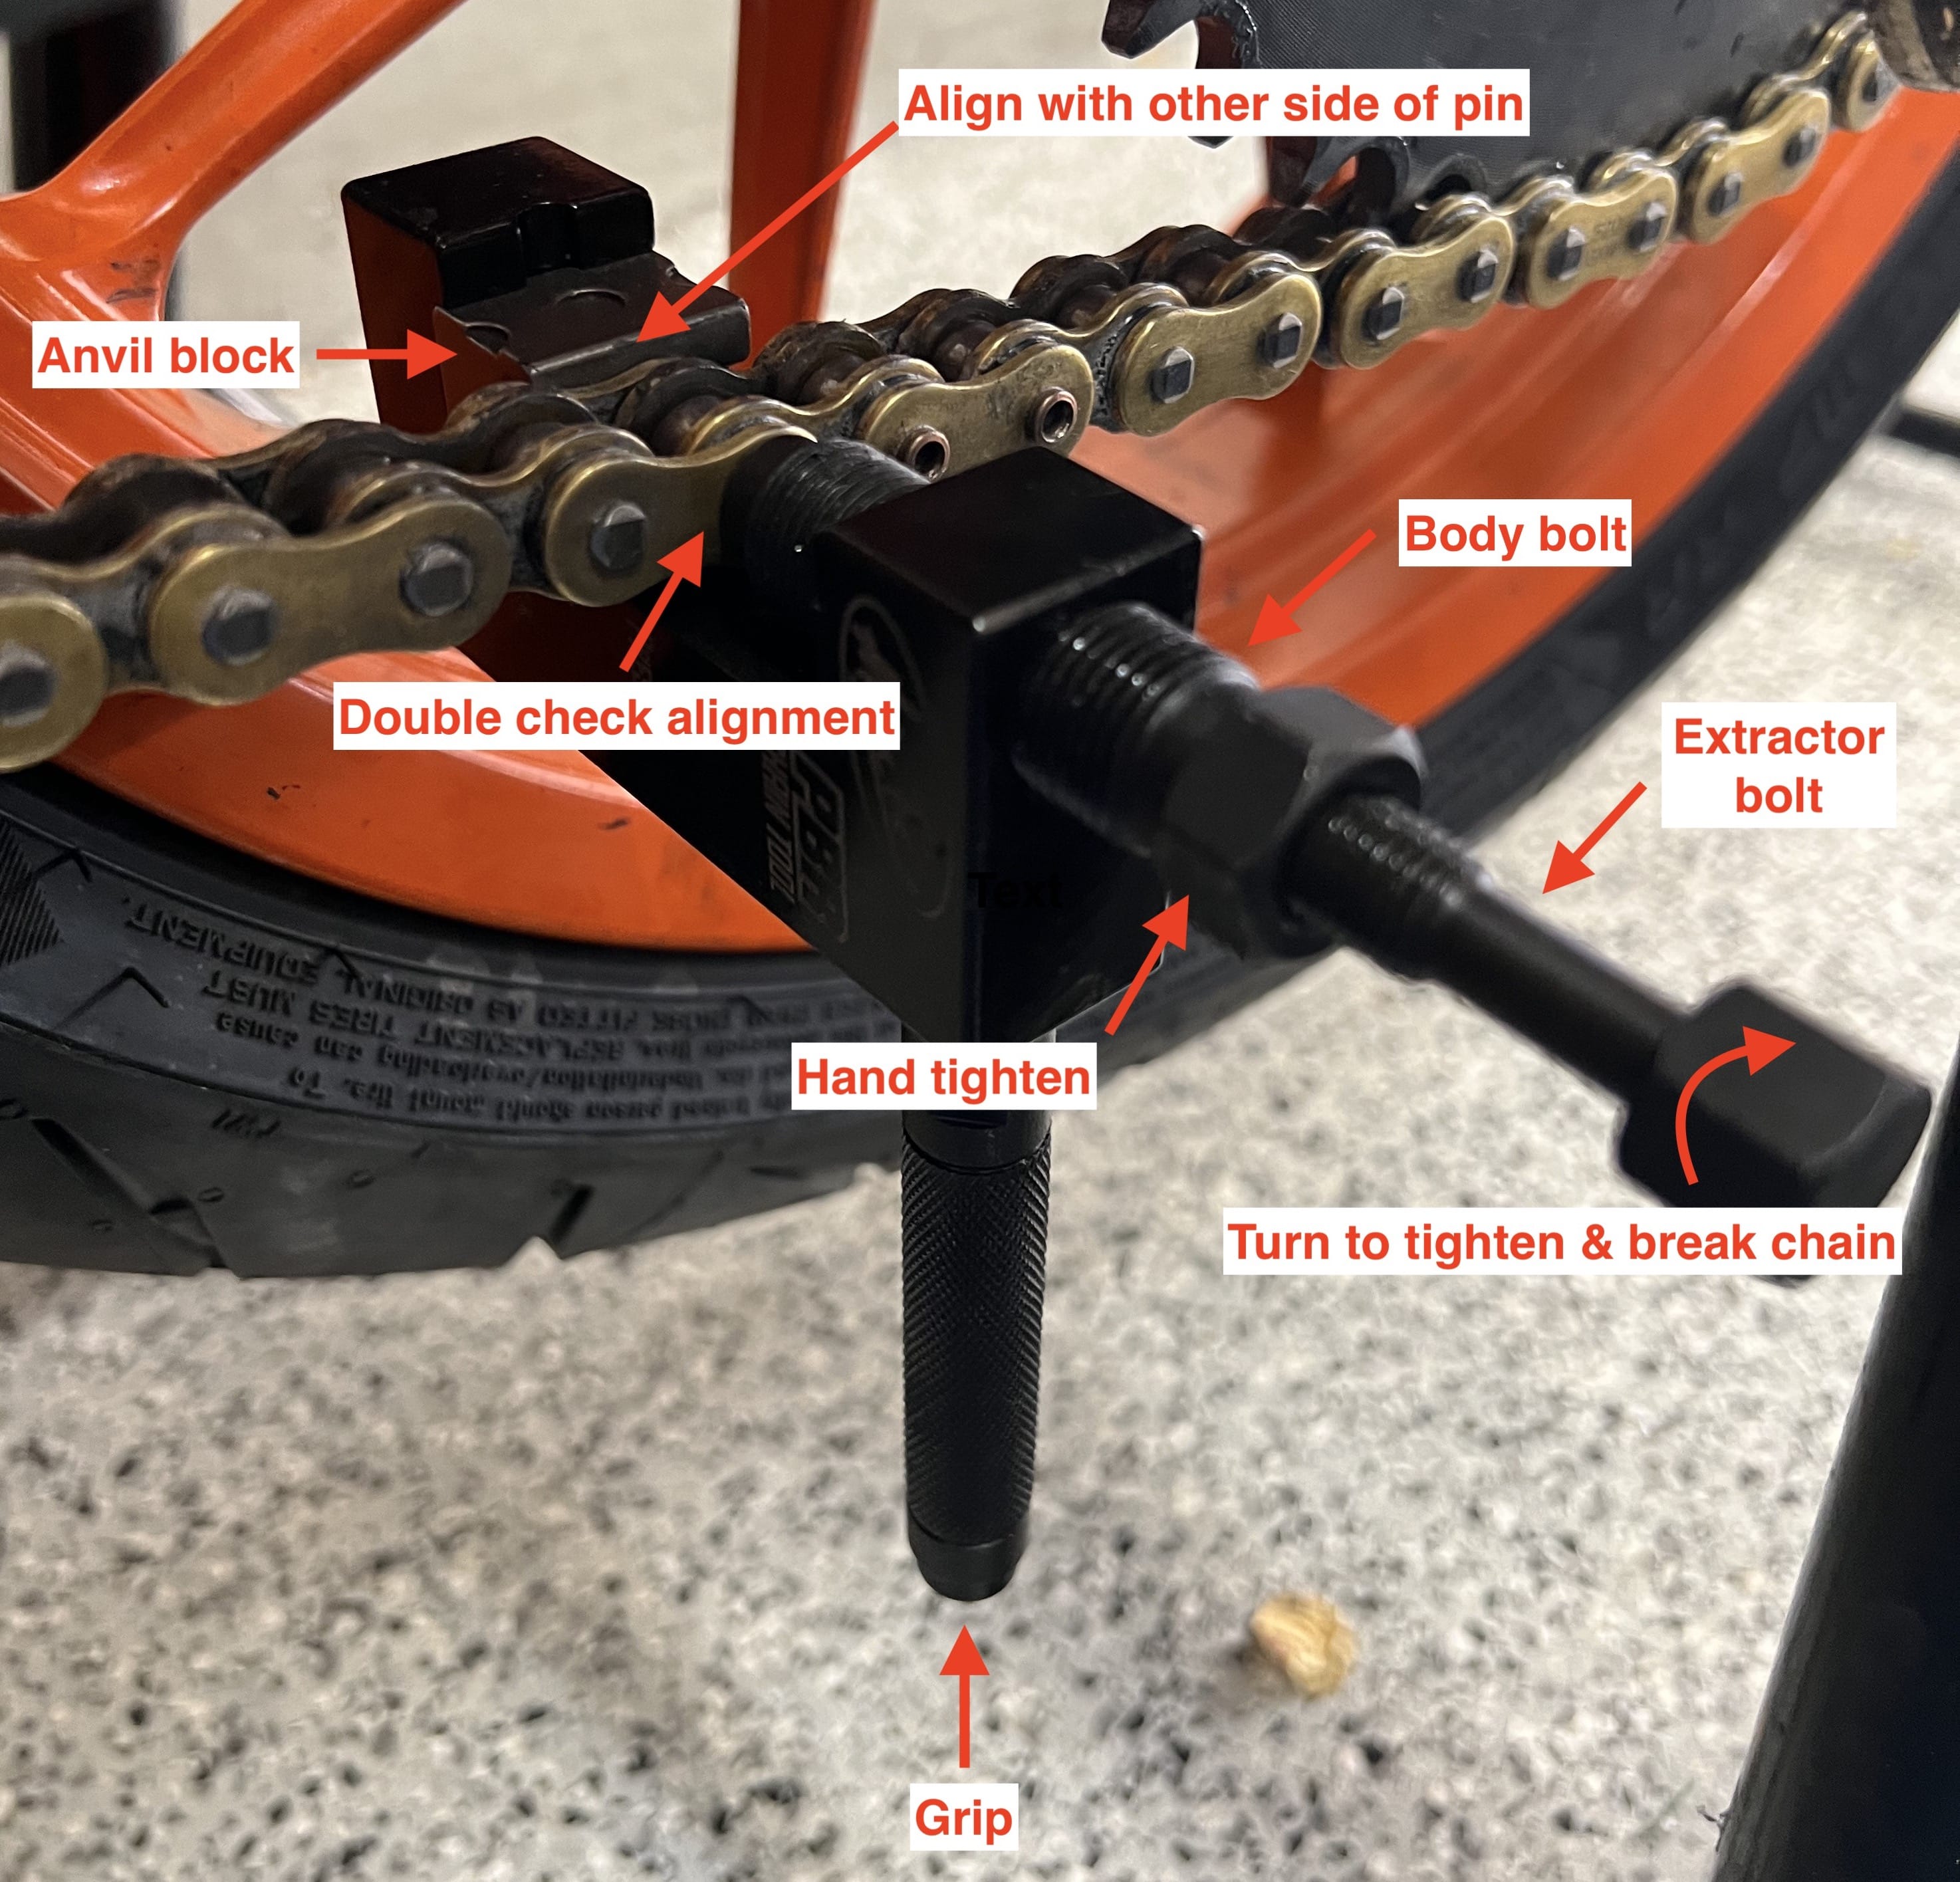
Various chain tools will have different components, but the principle is the same - the user will use a wrench to slowly turn an extractor bolt which will then force an extractor pin to push with a lot of force on a single pin on the chain, slowly forcing it out.
⚠️Before using the chain tool, read the manufacturer’s instructions⚠️
Using the chain tool requires patience and a lot of alignment double checking. Generally if you have to use an excessive amount of force check if you’ve aligned everything correctly. When breaking the chain you will feel a large initial resistance which will then spontaneously get significantly easier - this is a sign that the head of the pin has been broken and that the pin is in the process of being pushed through. This will still take some effort, but it will be a consistent effort. However there are a few things to pay attention to as you mount the tool on the chain:
- ensure that the extractor pin is recessed a few millimeters into the body bolt before tightening onto chain
- the anvil block has a little cutout where the other side of the pin fits into
- the body bolt should clamp hand tight onto the chain
- double check that the anvil block and body bolt align correctly with the chain pin
Once you’ve checked that, start rotating the extractor bolt and slowly push the pin out!
It’s helpful to remove the tool once in the beginning just to check if the extraction is progressing smoothly.
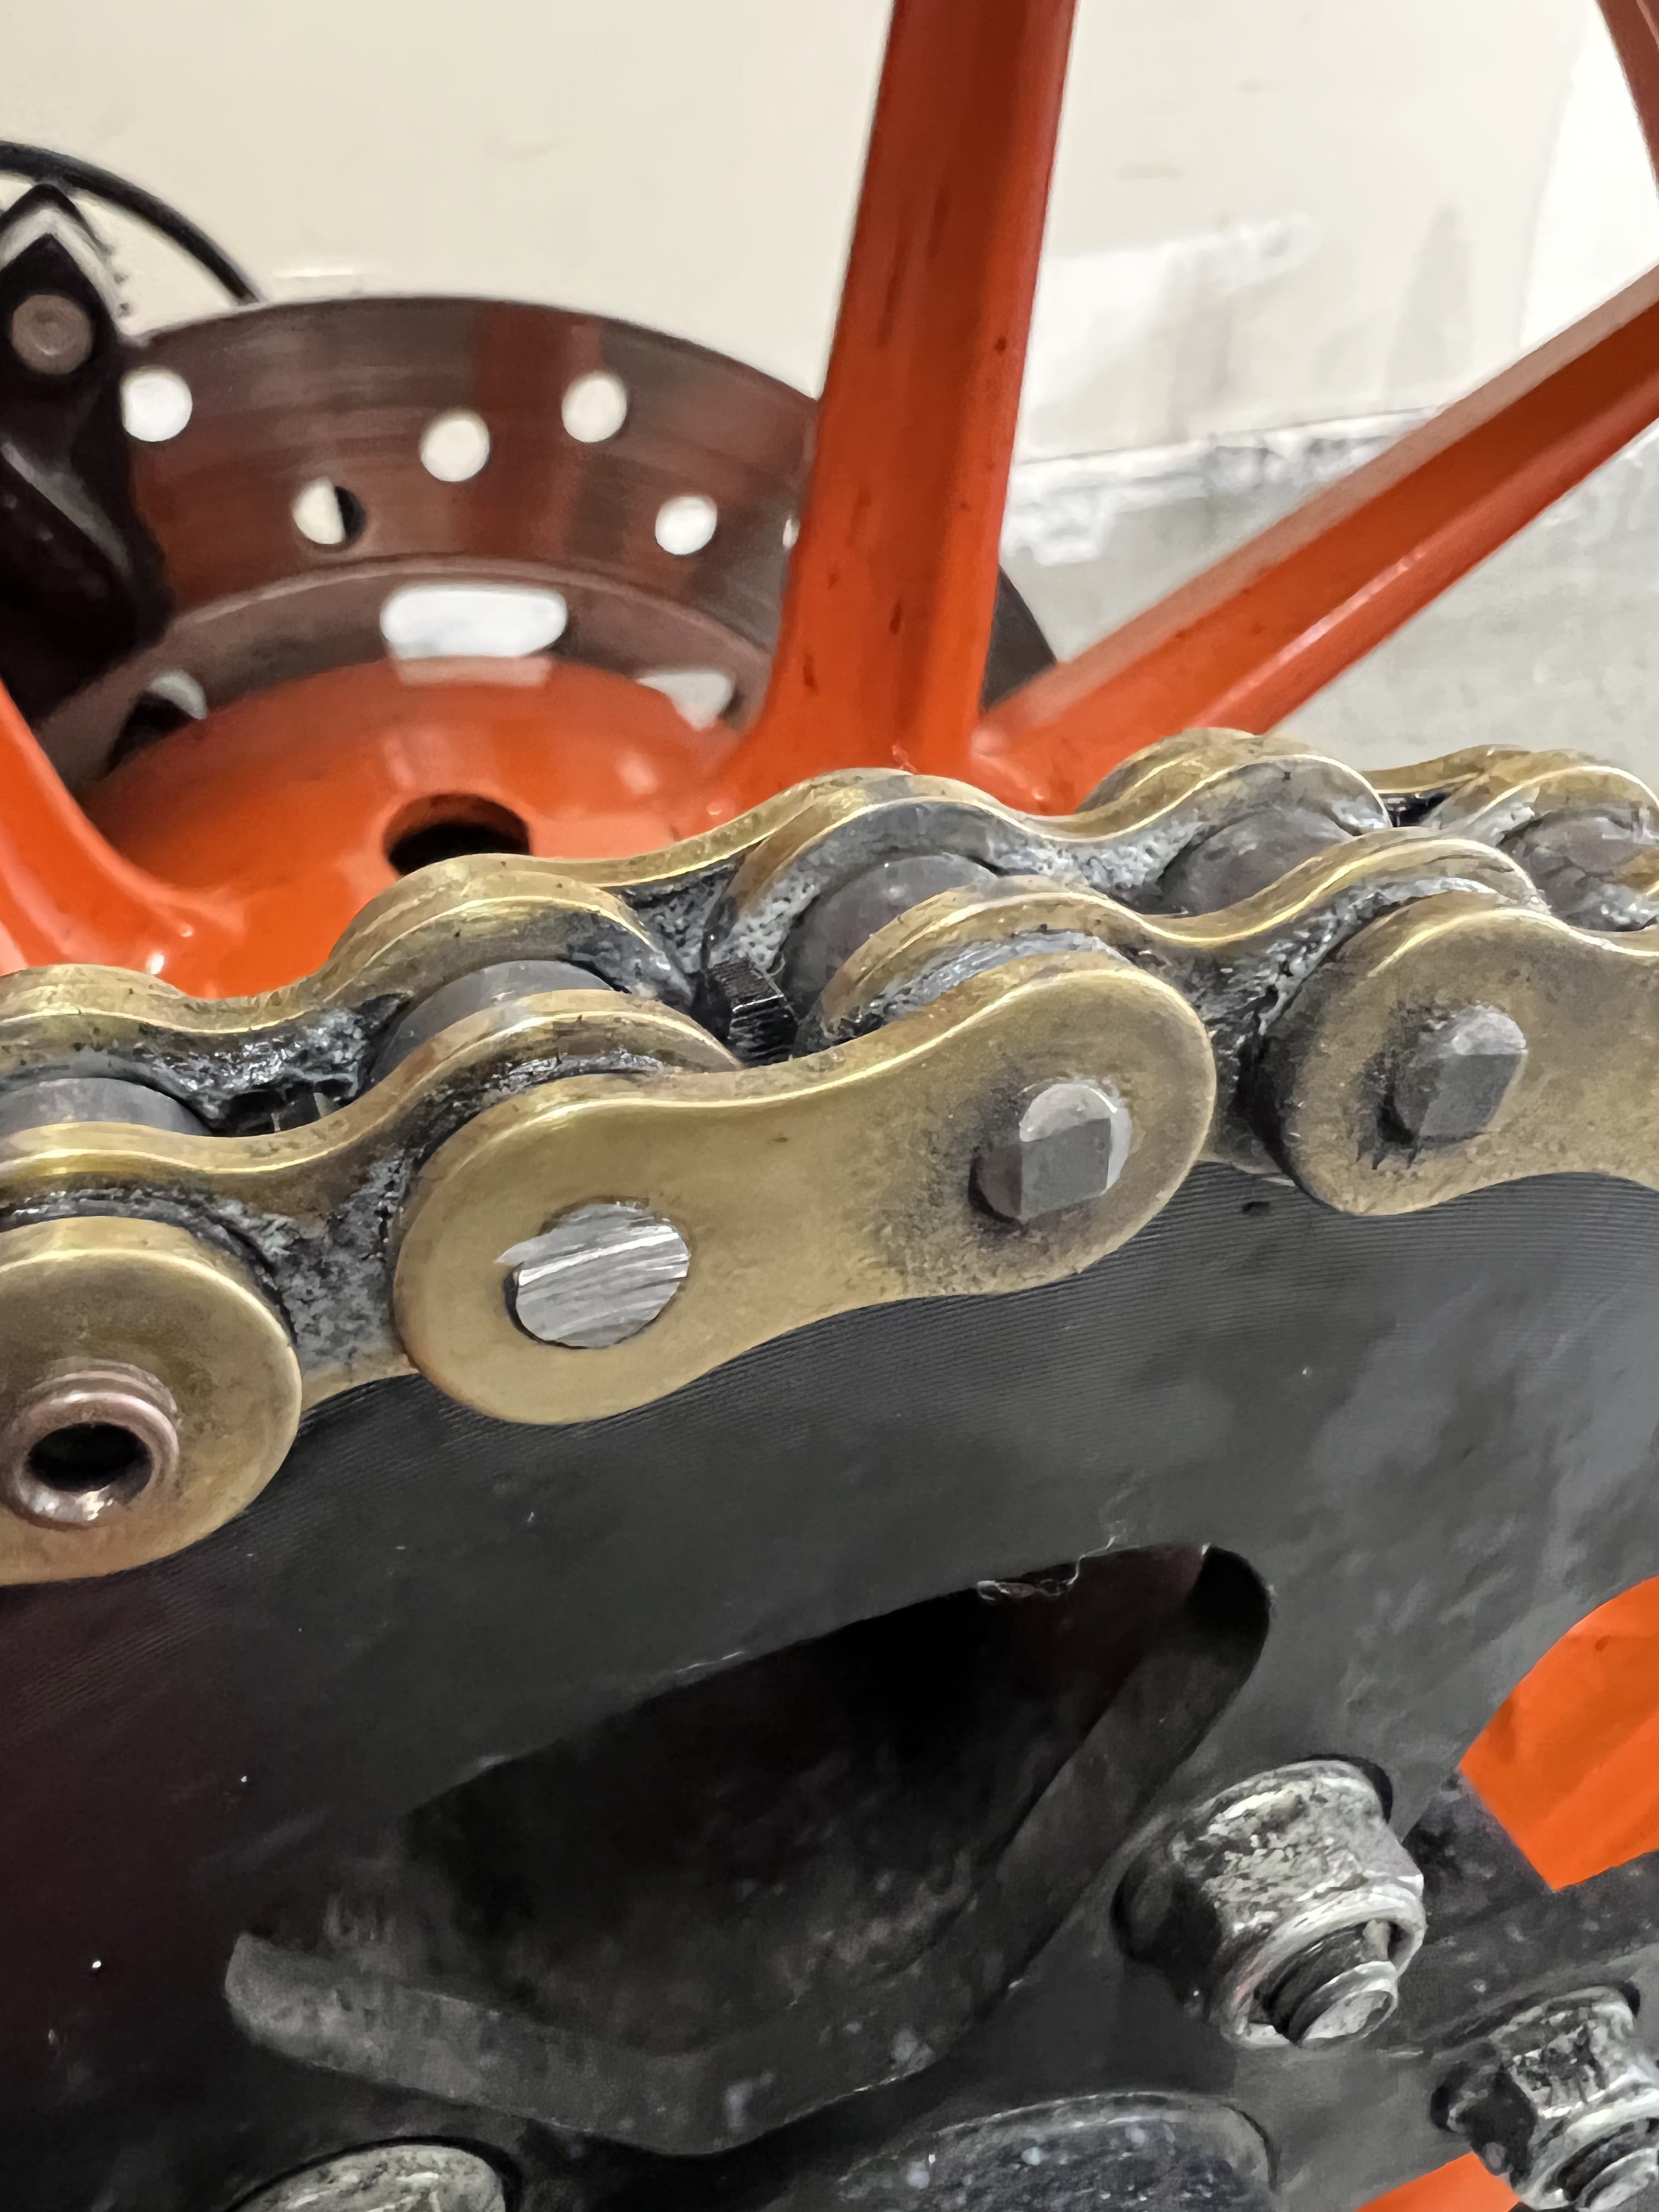
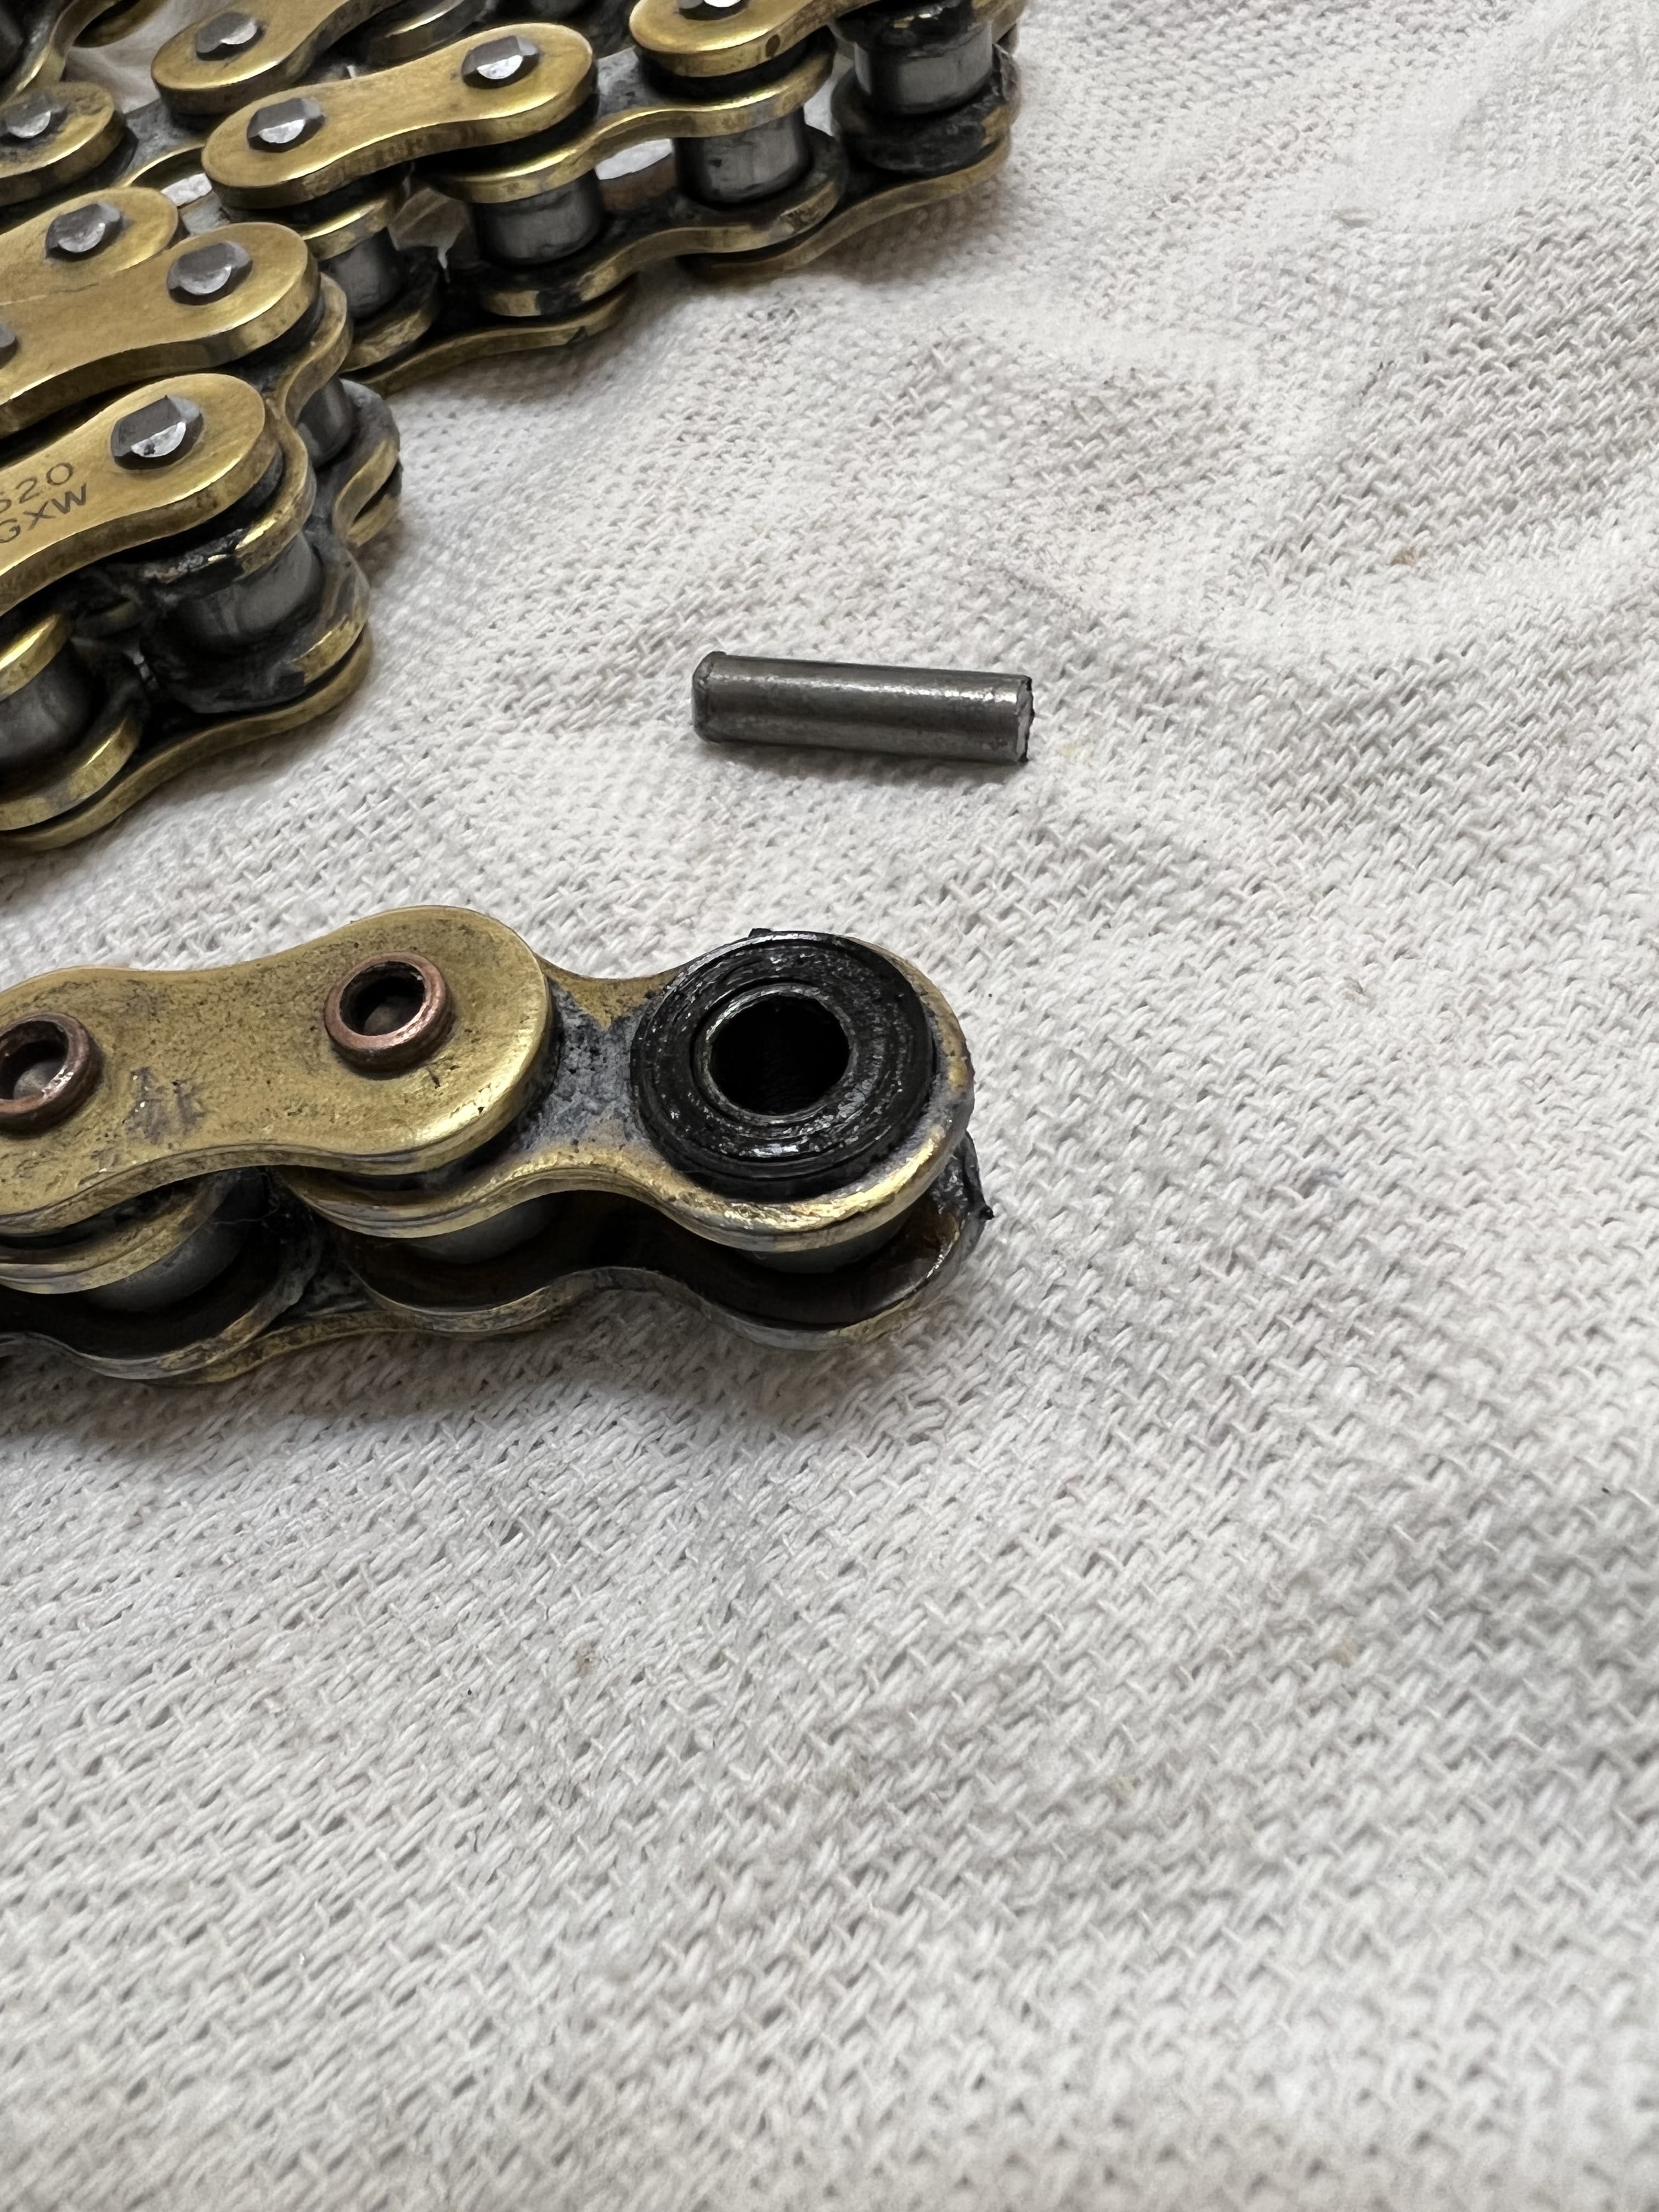
3) Removing the original chain
Once the pin is extracted completely, you can simply remove the chain by pulling slowly on one end. It’ll look something like the below, note the extracted pin and o-rings.
4) Replacing the front sprocket
Now that the chain is off, we can replace the front sprocket. As mentioned previously, the steps here will vary from bike to bike. On the 390 Duke, there are two small bolts that hold a retaining clip in place which needs to be rotated slightly. Only after being rotated will the “teeth” on the retaining clip align in a way that the clip can be pulled out. Once that’s done the front sprocket can simply be pulled off.
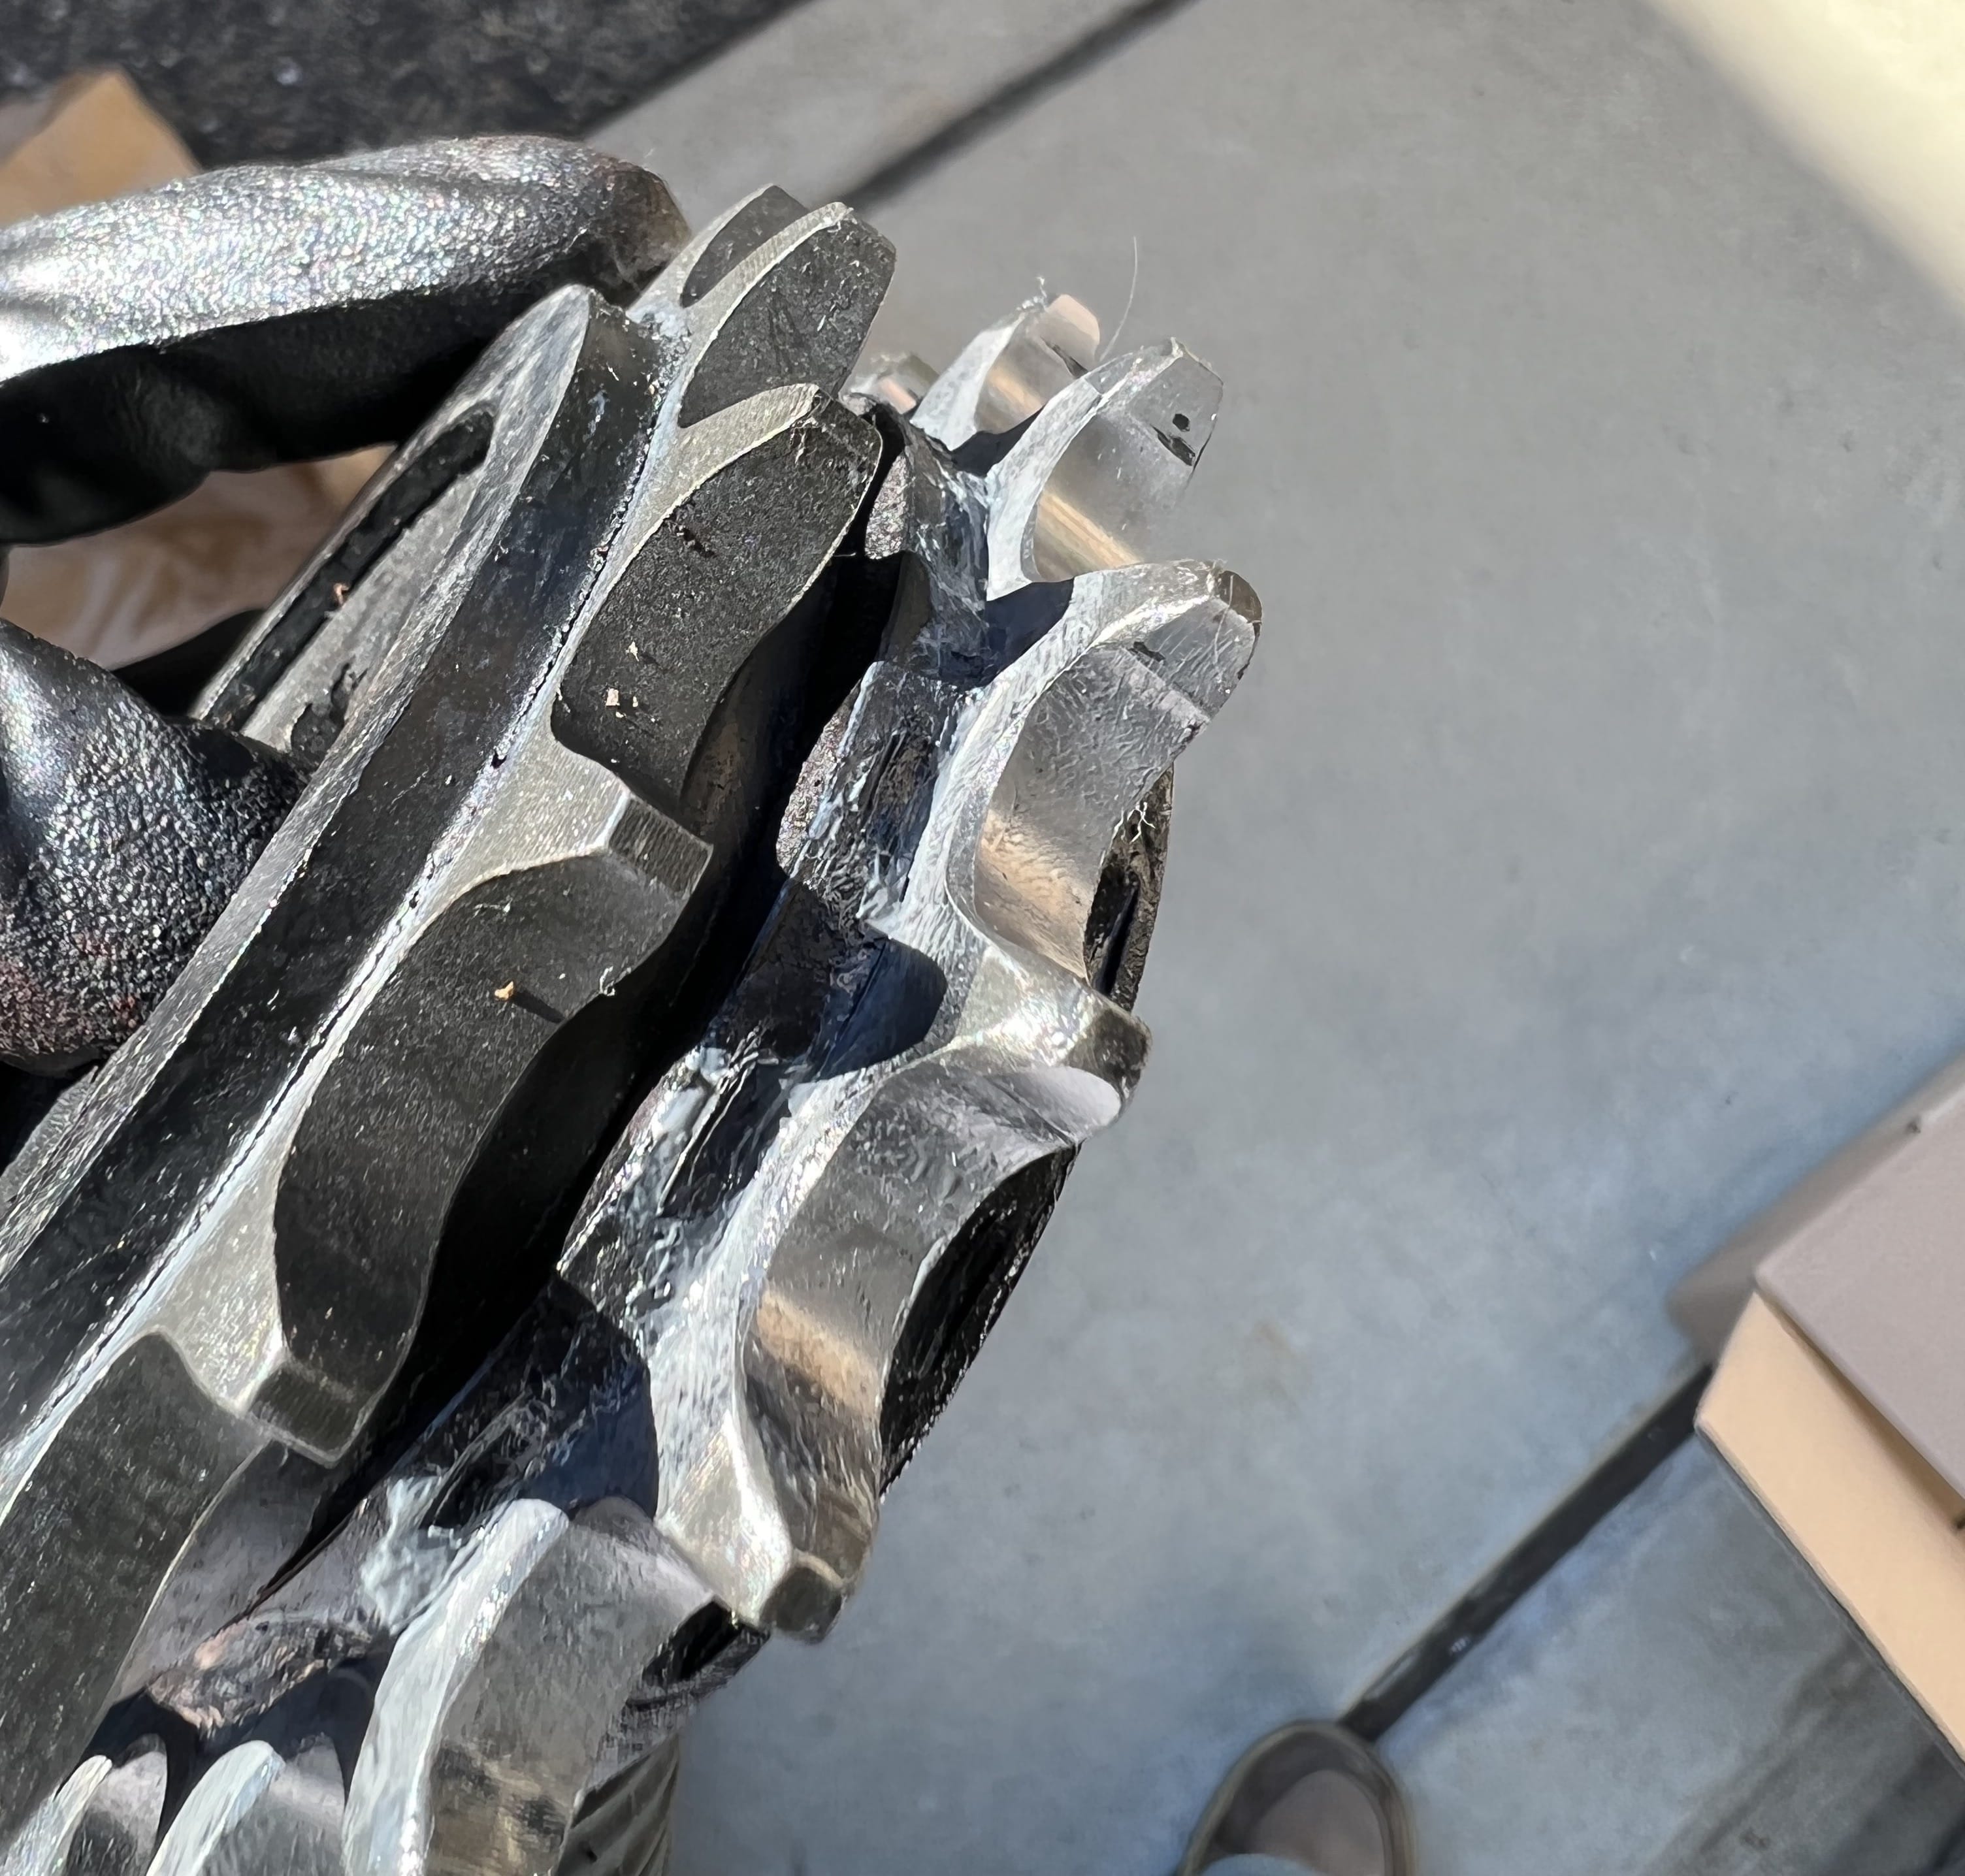
This is also a great opportunity to compare the old and worn front sprocket with your brand new one. Wear will be more easily seen on front sprockets as there are fewer teeth than the rear sprocket - where the wear and tear is more spread out. It should make sense now why the general recommendation is to replace chain and sprockets as a set - using a new chain on a worn sprocket will stress the chain more as it is forced into an existing wear pattern.
Replace sprockets and chains as a set!
It is also an excellent opportunity to clean around the chain guard and front sprocket!
5) Removing the rear wheel
The exact steps for this vary from bike to bike, but in general it involves the following:
- Raising the bike with a rear stand
- (Possibly) removing the rear wheel speed sensor
- Removing the chain adjusters
- Pushing the wheel forward and removing the chain (if not already removed)
- While holding the wheel, removing the spindle/axle
- Pulling out the rear wheel
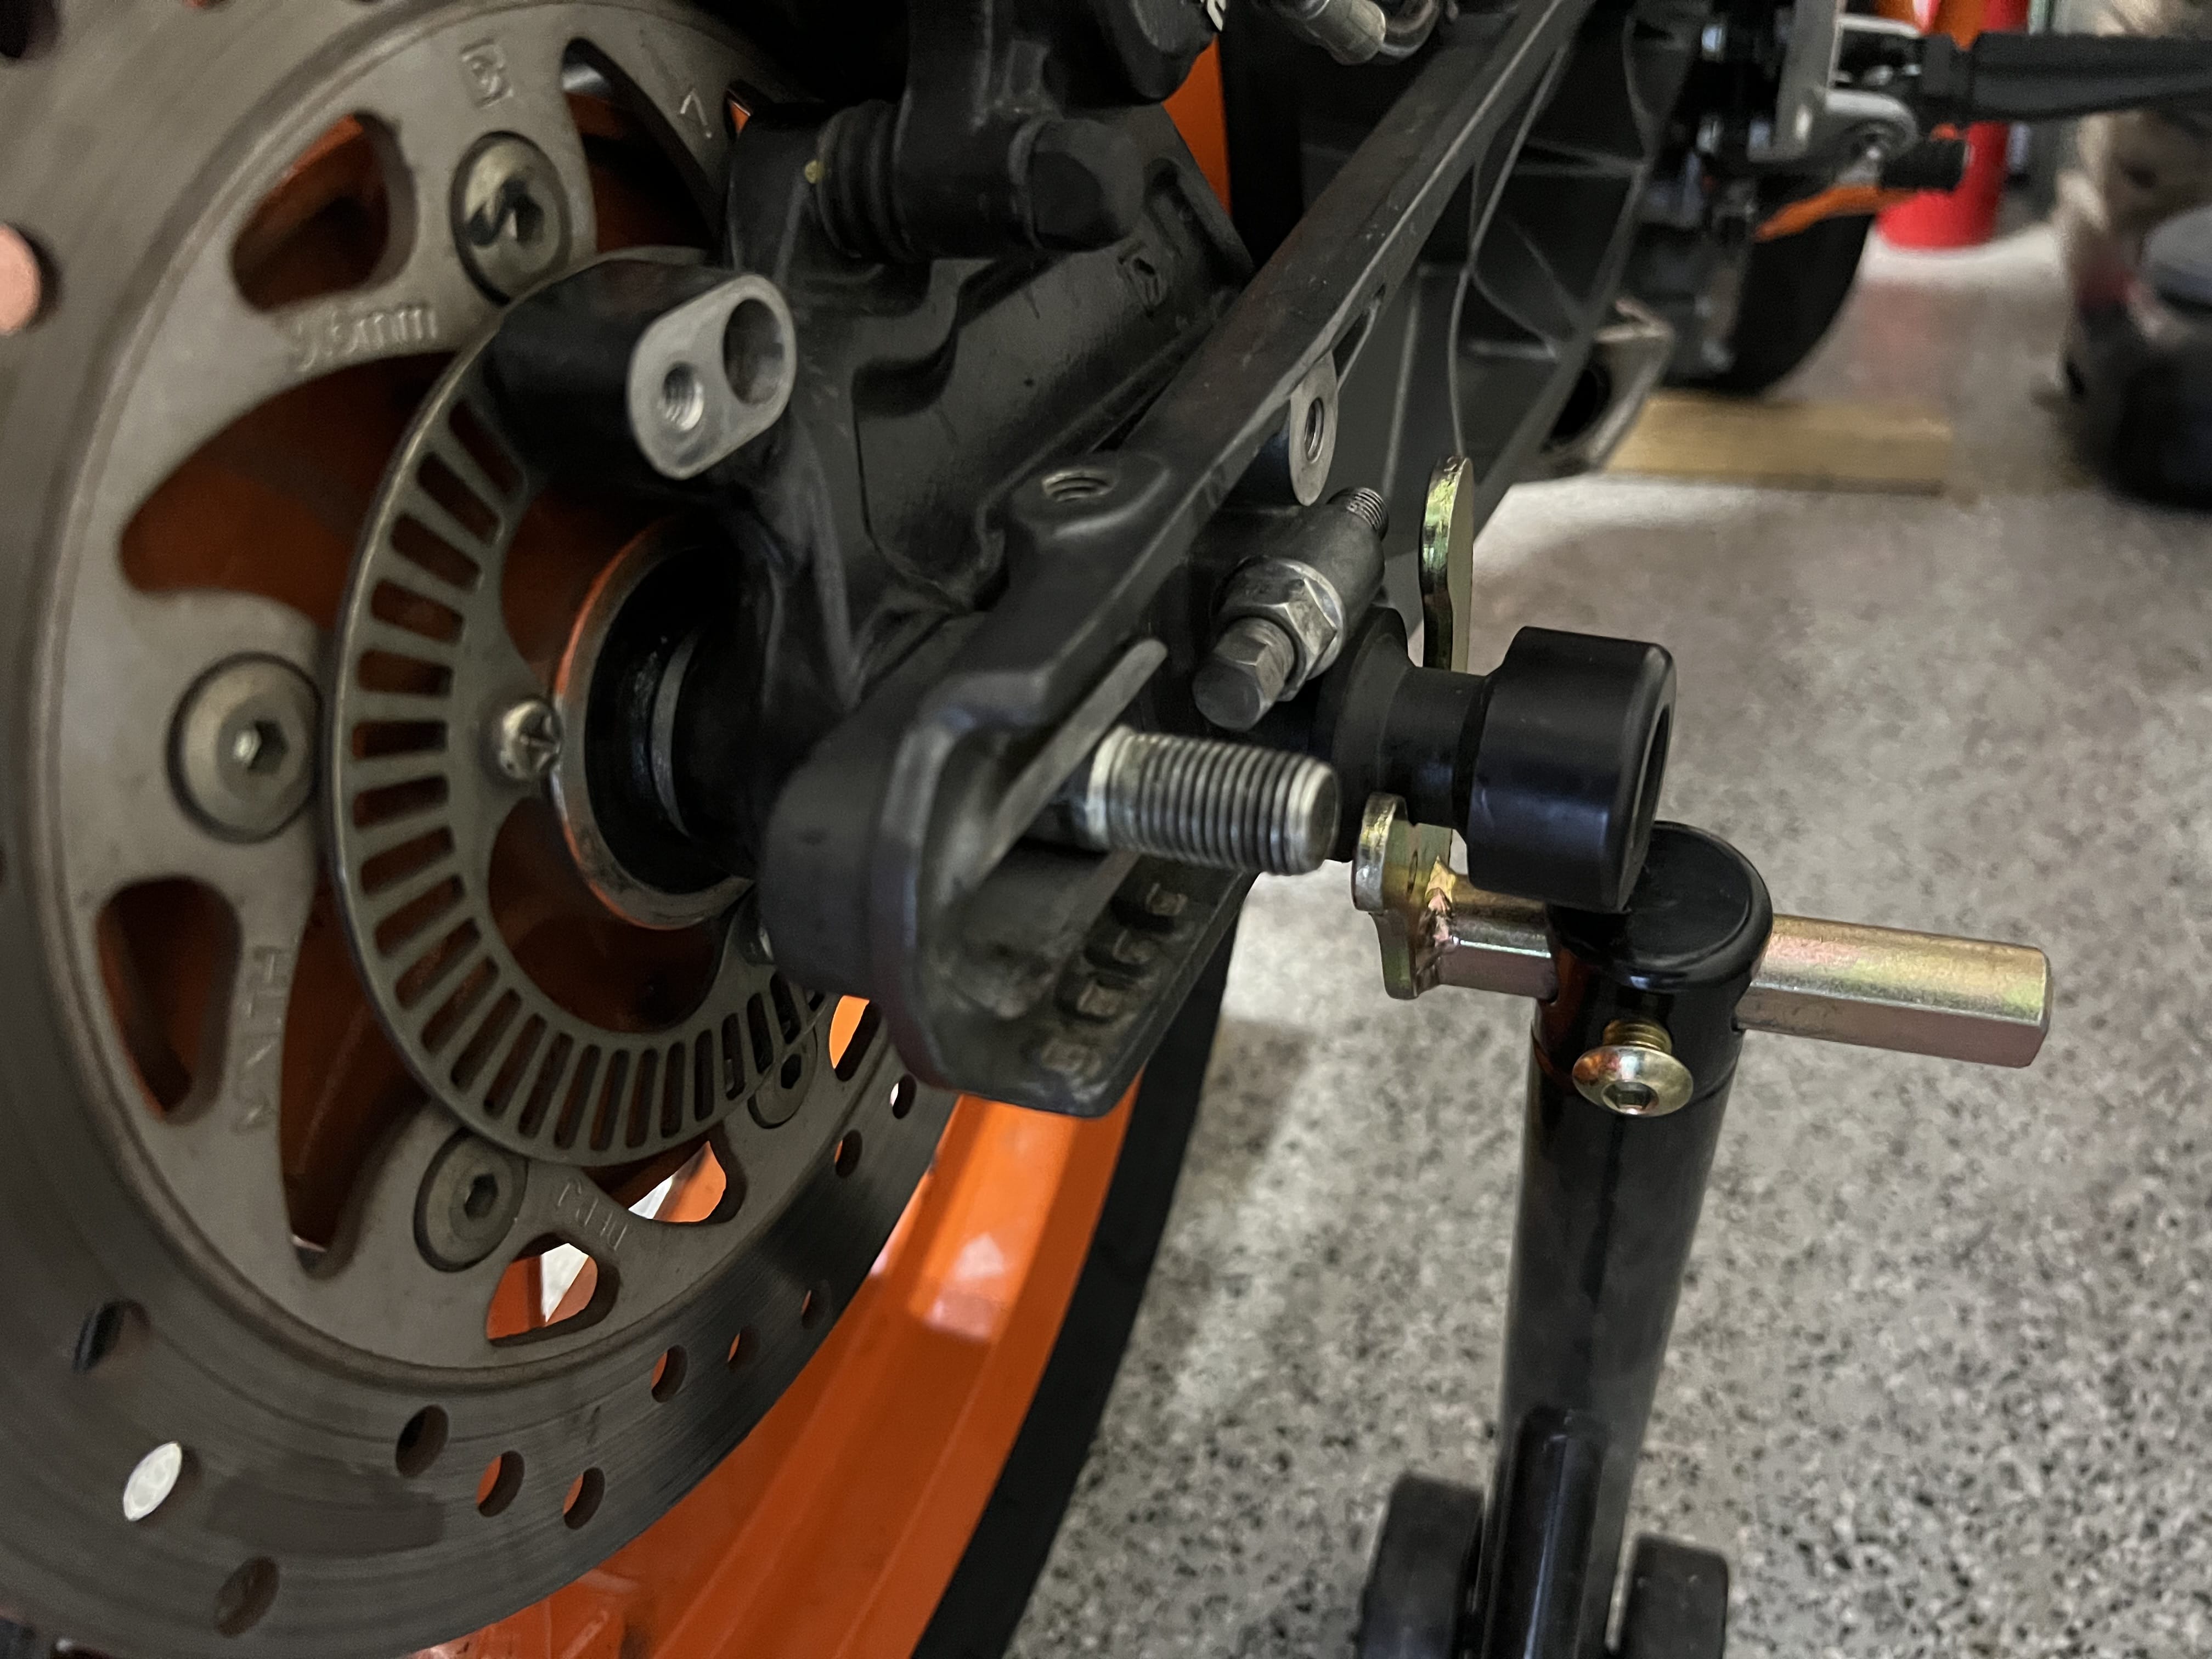

Once the wheel is removed you’ll have a bunch of bolts and other things lying around. A good trick to keep everything organized the way it was is to re-attach the spindle, adjusters, and nuts without the rear wheel.

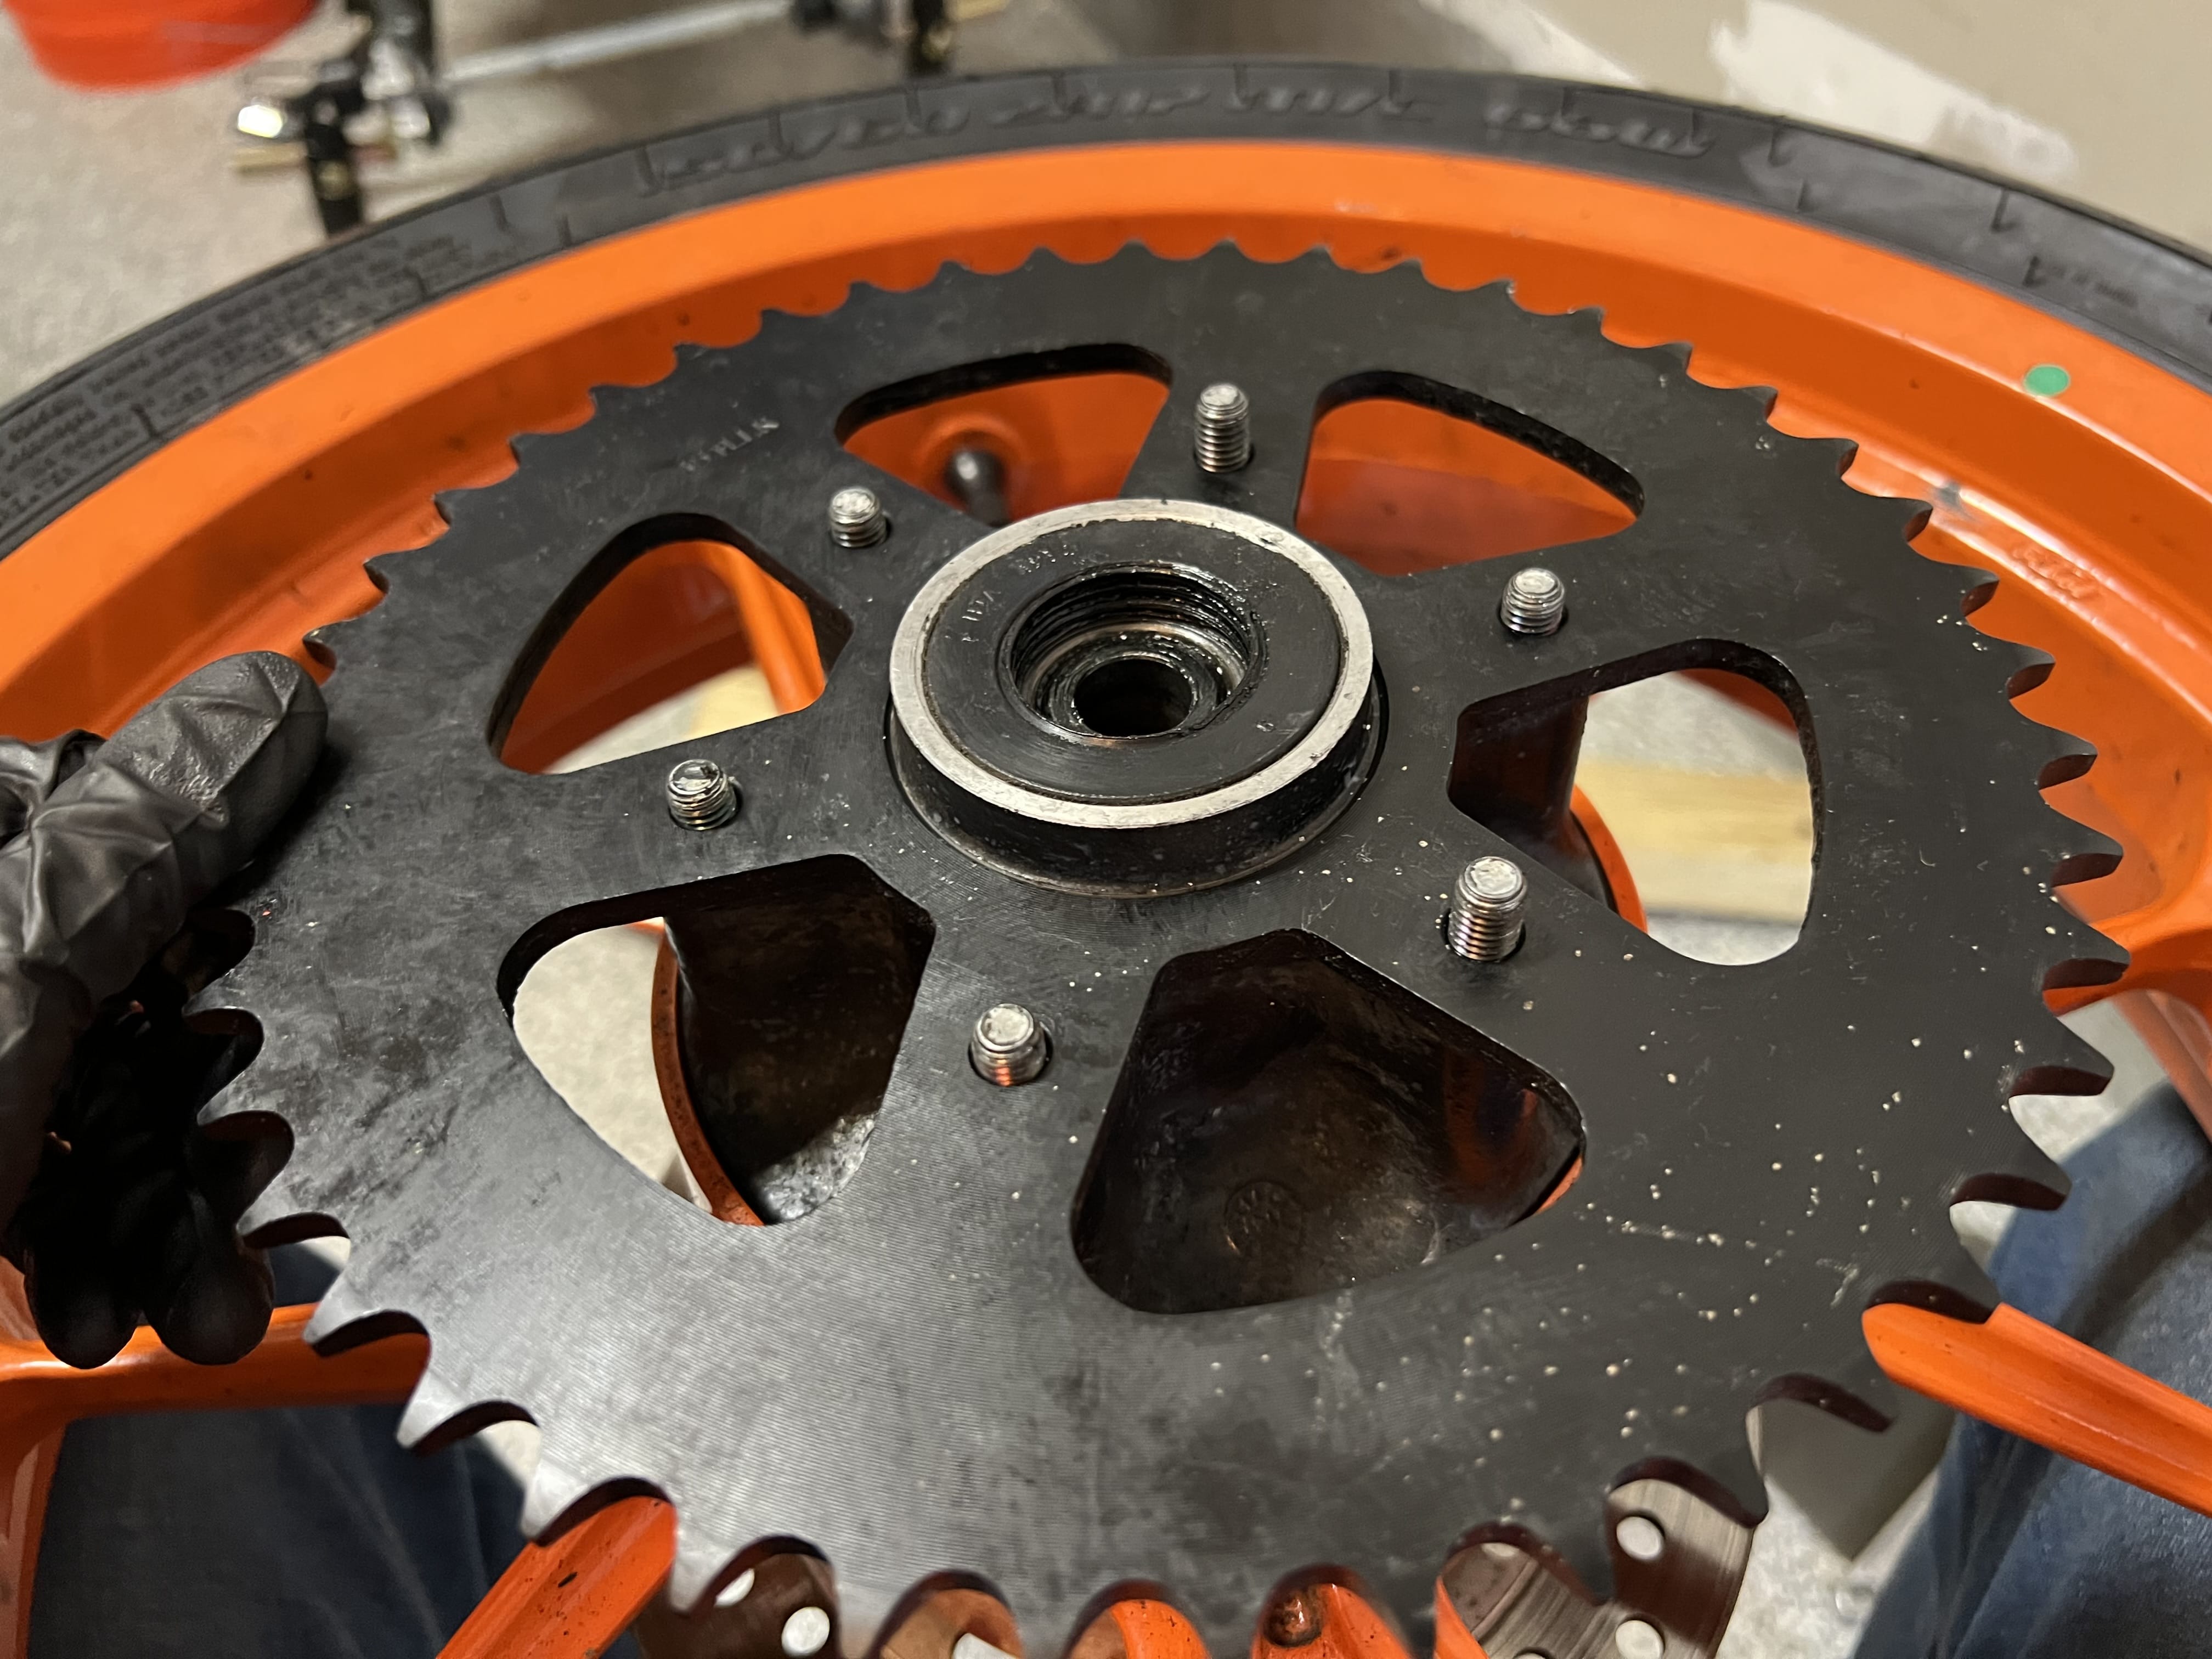
6) Replacing the rear sprocket
Replacing the rear sprocket is a relatively straightforward affair. It’s a matter of removing the existing bolts holding the old sprocket in place, swapping out the sprocket, and tightening the bolts down to the proper torque.
Tighten the sprocket bolts in a star pattern
Check your owner’s or service manual if the sprocket bolts require threadlocker
Quick Note on the star pattern
The “star pattern” is a way to tighten down sets of fasteners to ensure even torque and flatness of the item that’s being tightened against the surface it’s being tightened on. The process varies depending on how many fasteners are arranged on the item to be torqued down, but the general idea is to always go “across” when moving to the next fastener to tighten. Another core idea is to not immediately torque a fastener down to spec before moving on to the next, but to tighten gradually making multiple passes over each fastener in turn.


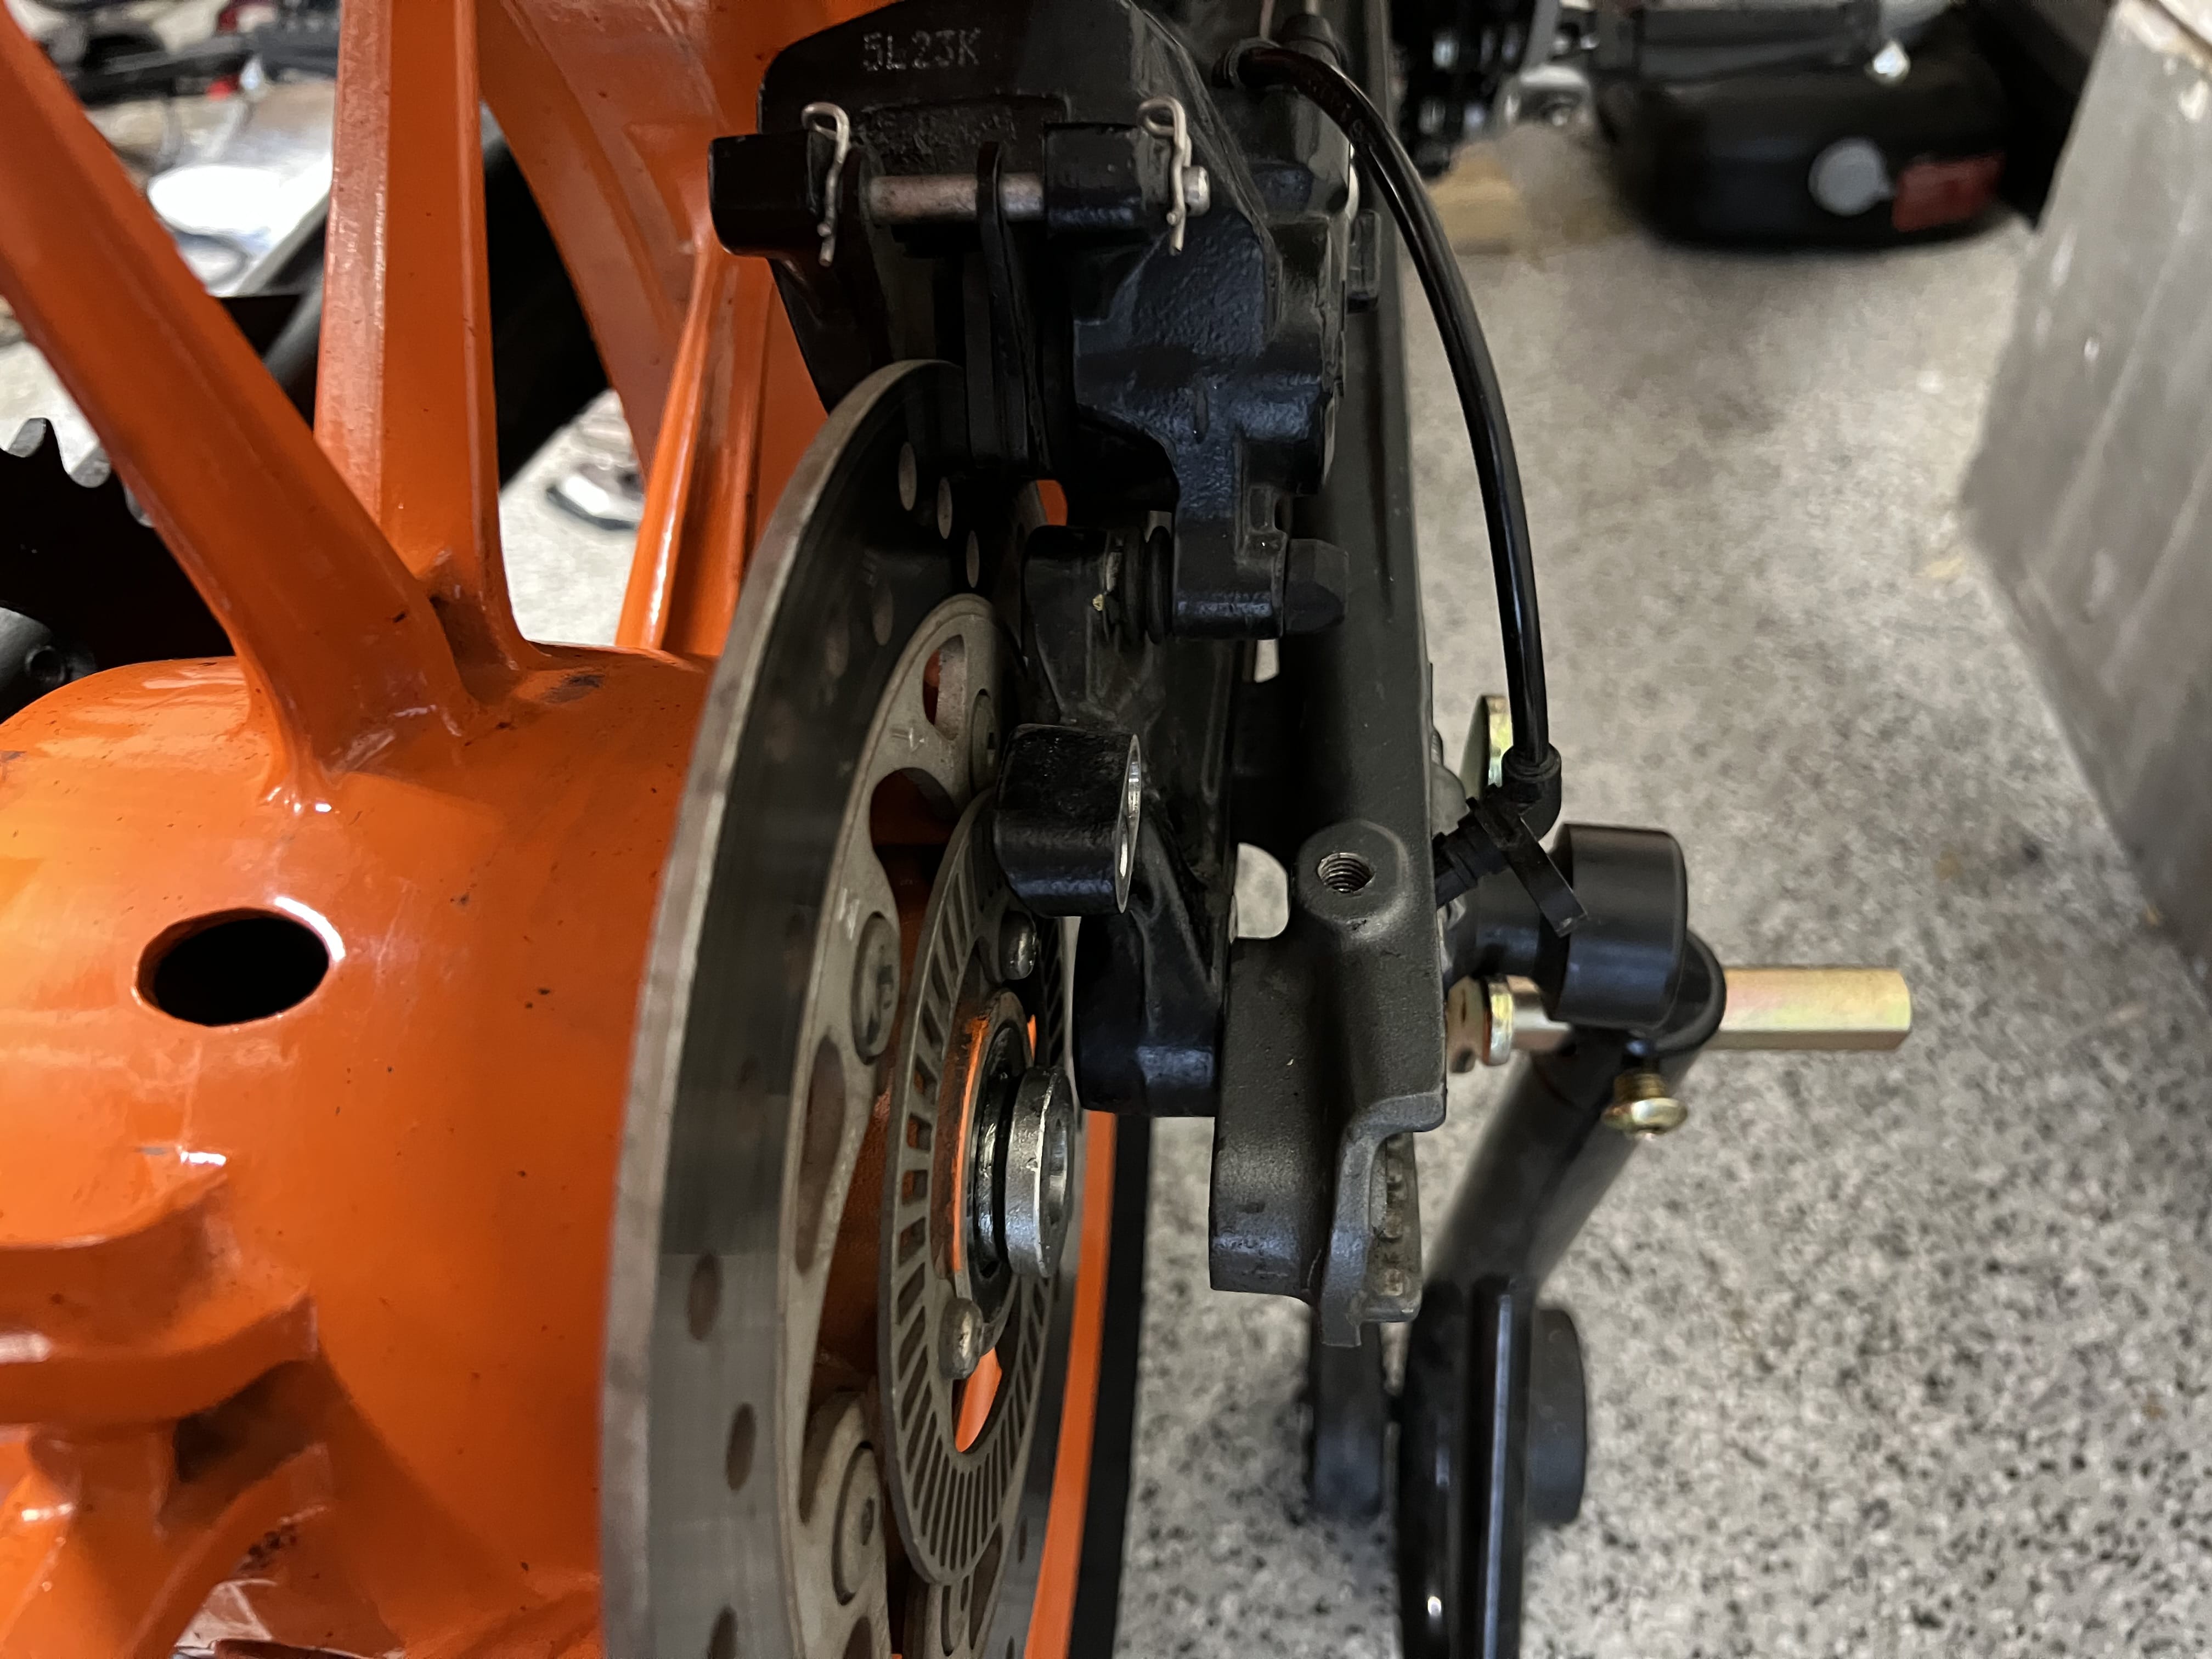
7) Mount the rear wheel
Re-mounting the rear wheel can be a bit tricky. It’s heavy and special attention needs to be paid so that the rear brake disk smoothly fits between the brake pads again. Again, read up on the instructions for your specific motorcycle. Generally there might be some spacers that need greasing, and the spindle/axle itself should be greased throughout (just making sure to avoid the threading on one end of the spindle). I use generic long-life waterproof grease. It’s also advisable to remove any grime you see.
The rough steps are as follows:
- Grease any and all parts that need greasing (spindle, spacers, etc.)
- Attach any spacers to the wheel
- Lift the wheel, making sure that the brake disk smoothly slides between the brake pads. This will take some effort - the wheel is heavy!
- Mount the chain adjustment/alignment mechanism (along with any washers) on one end of the spindle
- Push the spindle through the swing arm and wheel, until it pokes through the other side of the swing arm
- Attach the other side’s chain adjustment/alignment mechanism
- Hand tighten the spindle with its nut - the chain still needs to be mounted and adjusted!
- Mount the rear wheel speed sensor
If you have trouble lifting the wheel - get a buddy or slide some planks of wood underneath for support


8) Trimming the new chain to length
Chains come in standard lengths, like 112 links, 118, etc. Depending on your sprocket setup and motorcycle you might require a chain that’s different than the usual link counts. This naturally necessitates that the new chain be cut to length - a procedure identical to breaking the old chain.
However this is truly a “measure twice, cut once” situation as there isn’t a way to undo trimming the chain - I’ve never heard of someone lengthening chain by trying to use multiple master links 😂. To count the length of the chain, count each link individually. Unless you are also changing the sprocket tooth count the link count will be the same. You also might find it helpful to lay the old and new chain out next to each other so you can see exactly how many links to remove. Note however that the old chain, even with the same link count, will be slightly longer due to having stretched over its lifetime.
It’s helpful to have a stable platform when trimming the new chain. It is possible to do it off the bike of course, but I chose to mount the new chain and then trim it to the correct length.

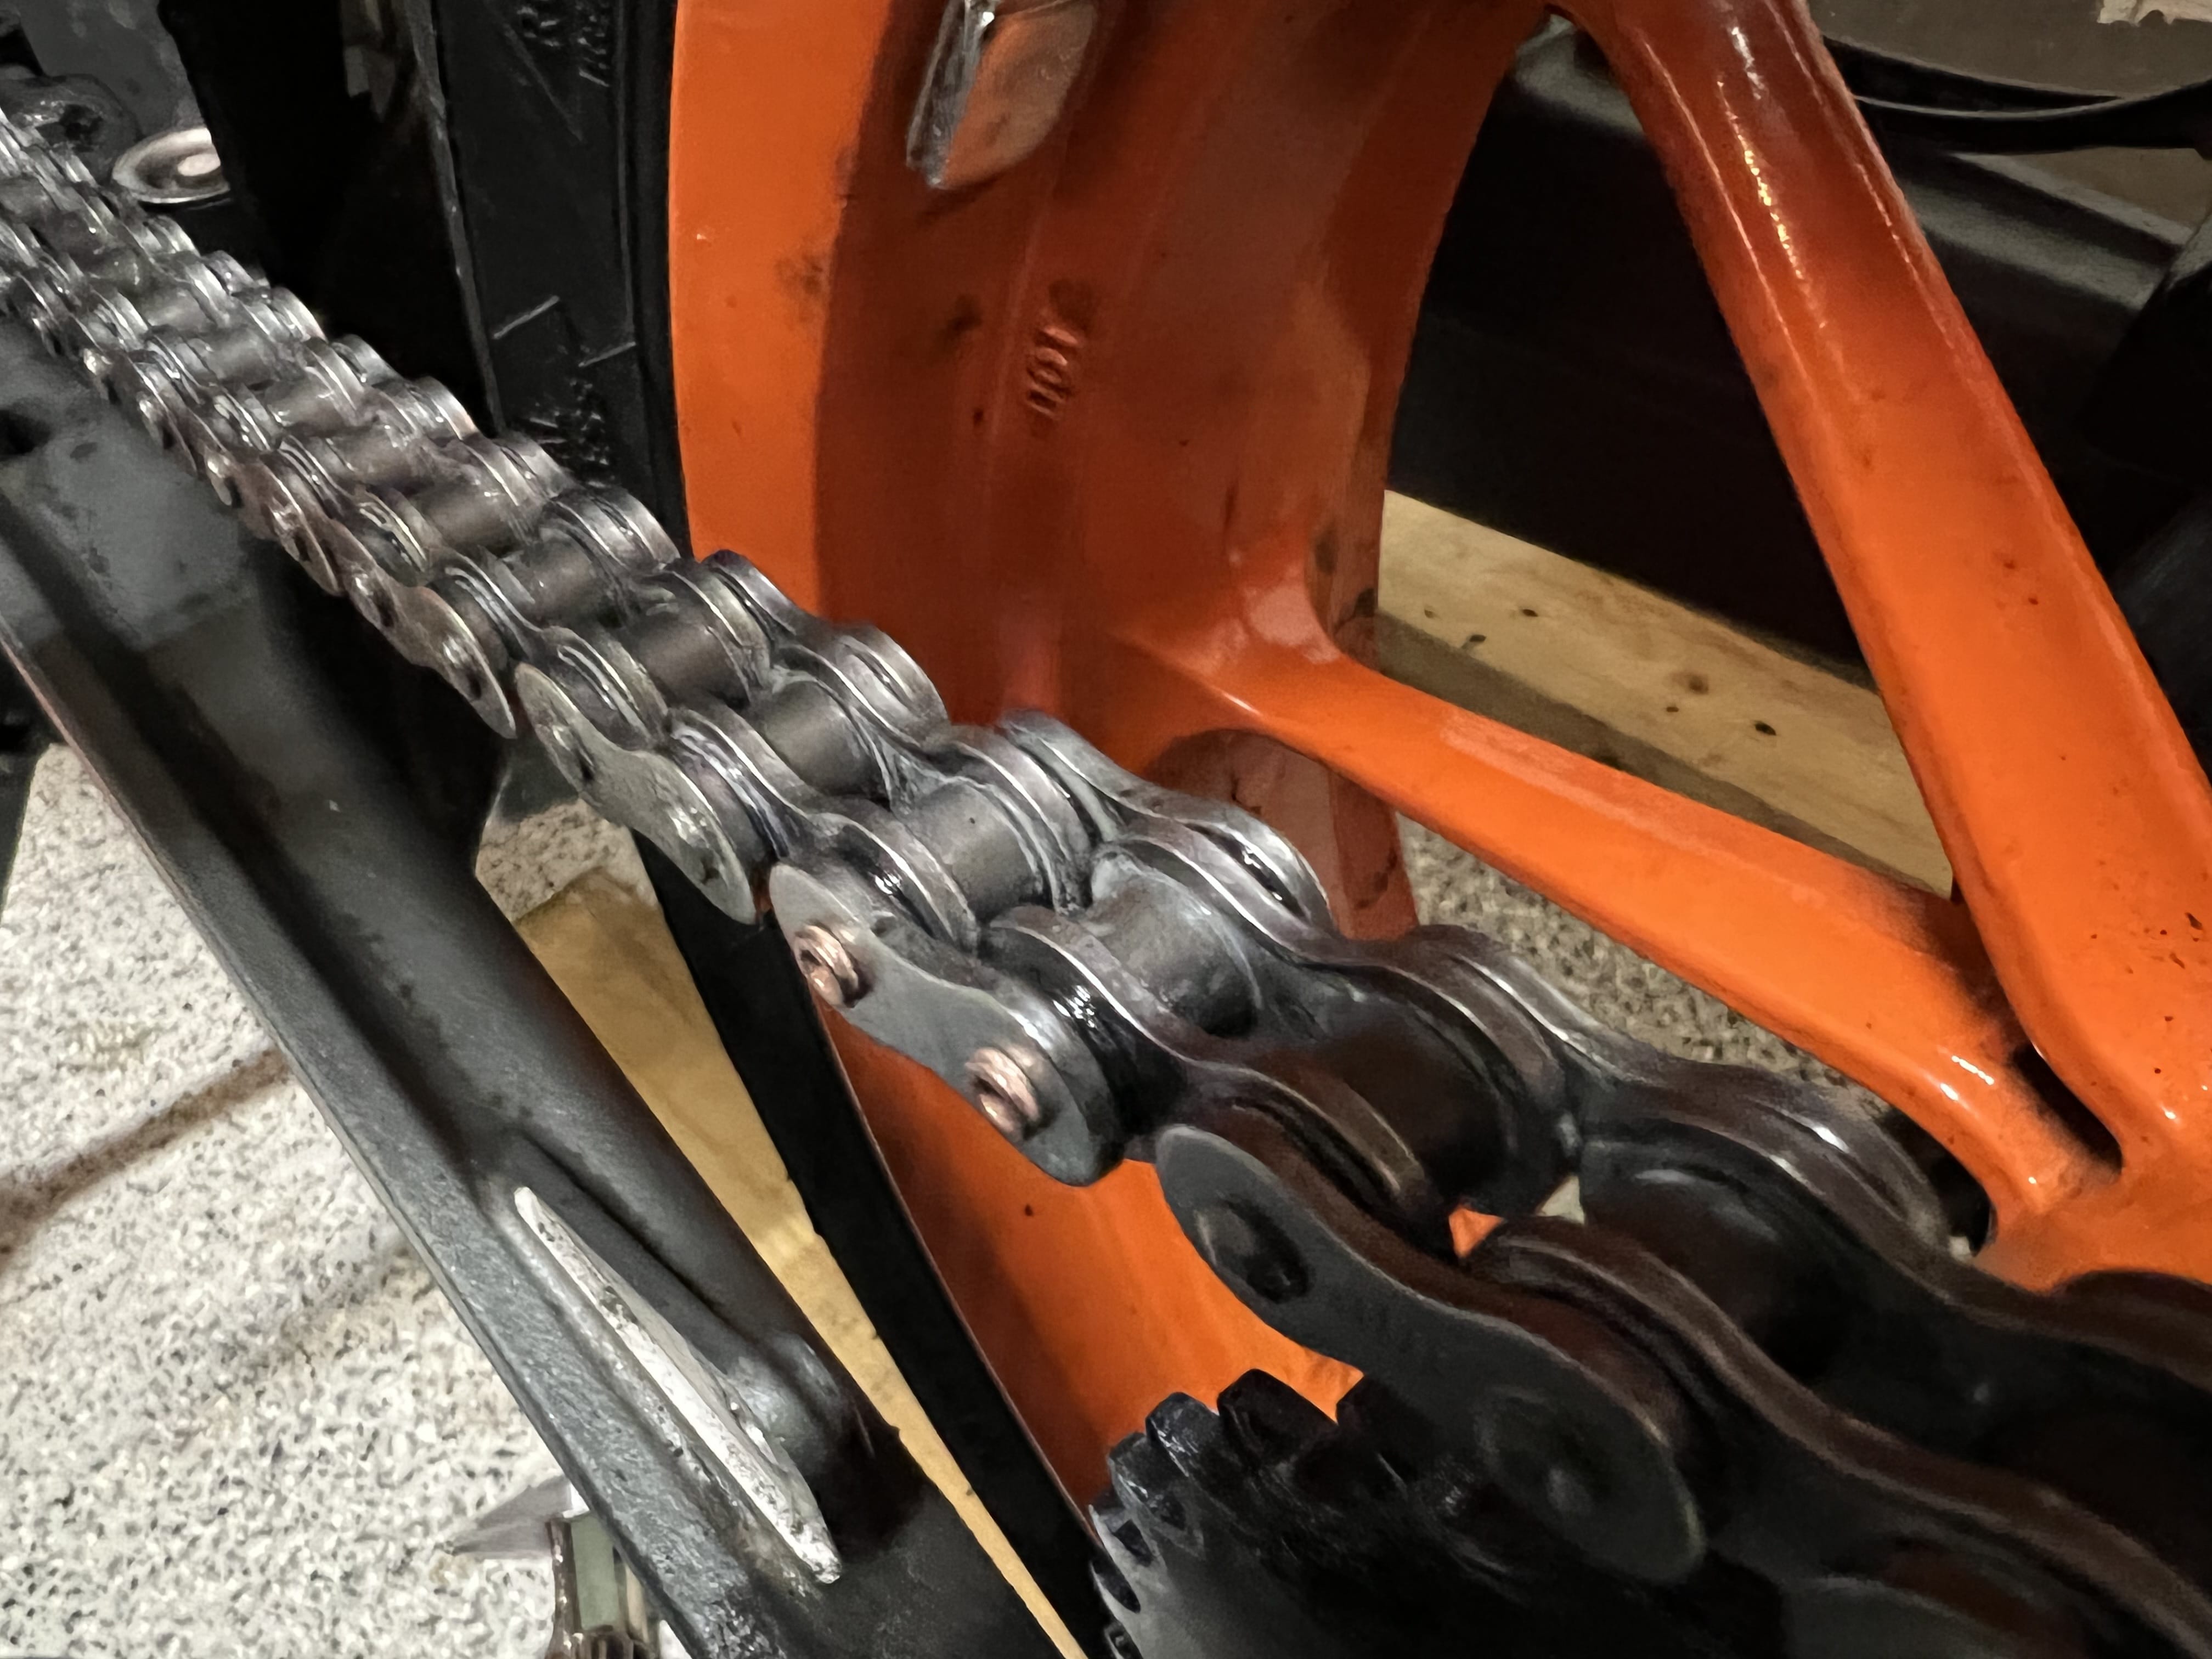
9) Mount new chain
If you haven’t done so in the previous step - now is the time to do it. It’s as simple as feeding the chain through the front sprocket and laying it out on the rear sprocket like so:

10) Attach master link
This is where the process gets more interesting and a little more difficult. But before that, let’s go on a quick tangent and talk about the two types of master links.
Rivet vs. clip type master links
Right now our new chain has two ends that need to mated together to form an endless chain. This can be done with two kinds of so-called “master links” - rivet and clip type links. Clip type links are easier to use and feature a clip that will slide over the two chain pins preventing the side plate from coming off. Rivet type master links need to be riveted - that is the head of the pins on one end will be pressed out a little bit (kind of like a small mushroom) so they are wider at the end, ensuring that the side plate cannot come off.
Rivet type links are strongly recommended as once properly installed basically cannot come off. If the clip of a clip-type master links is removed (ex. because a rock strike), it’s possible that the side plate comes off while riding. This could result in the chain quite violently being ejected down the road behind you.
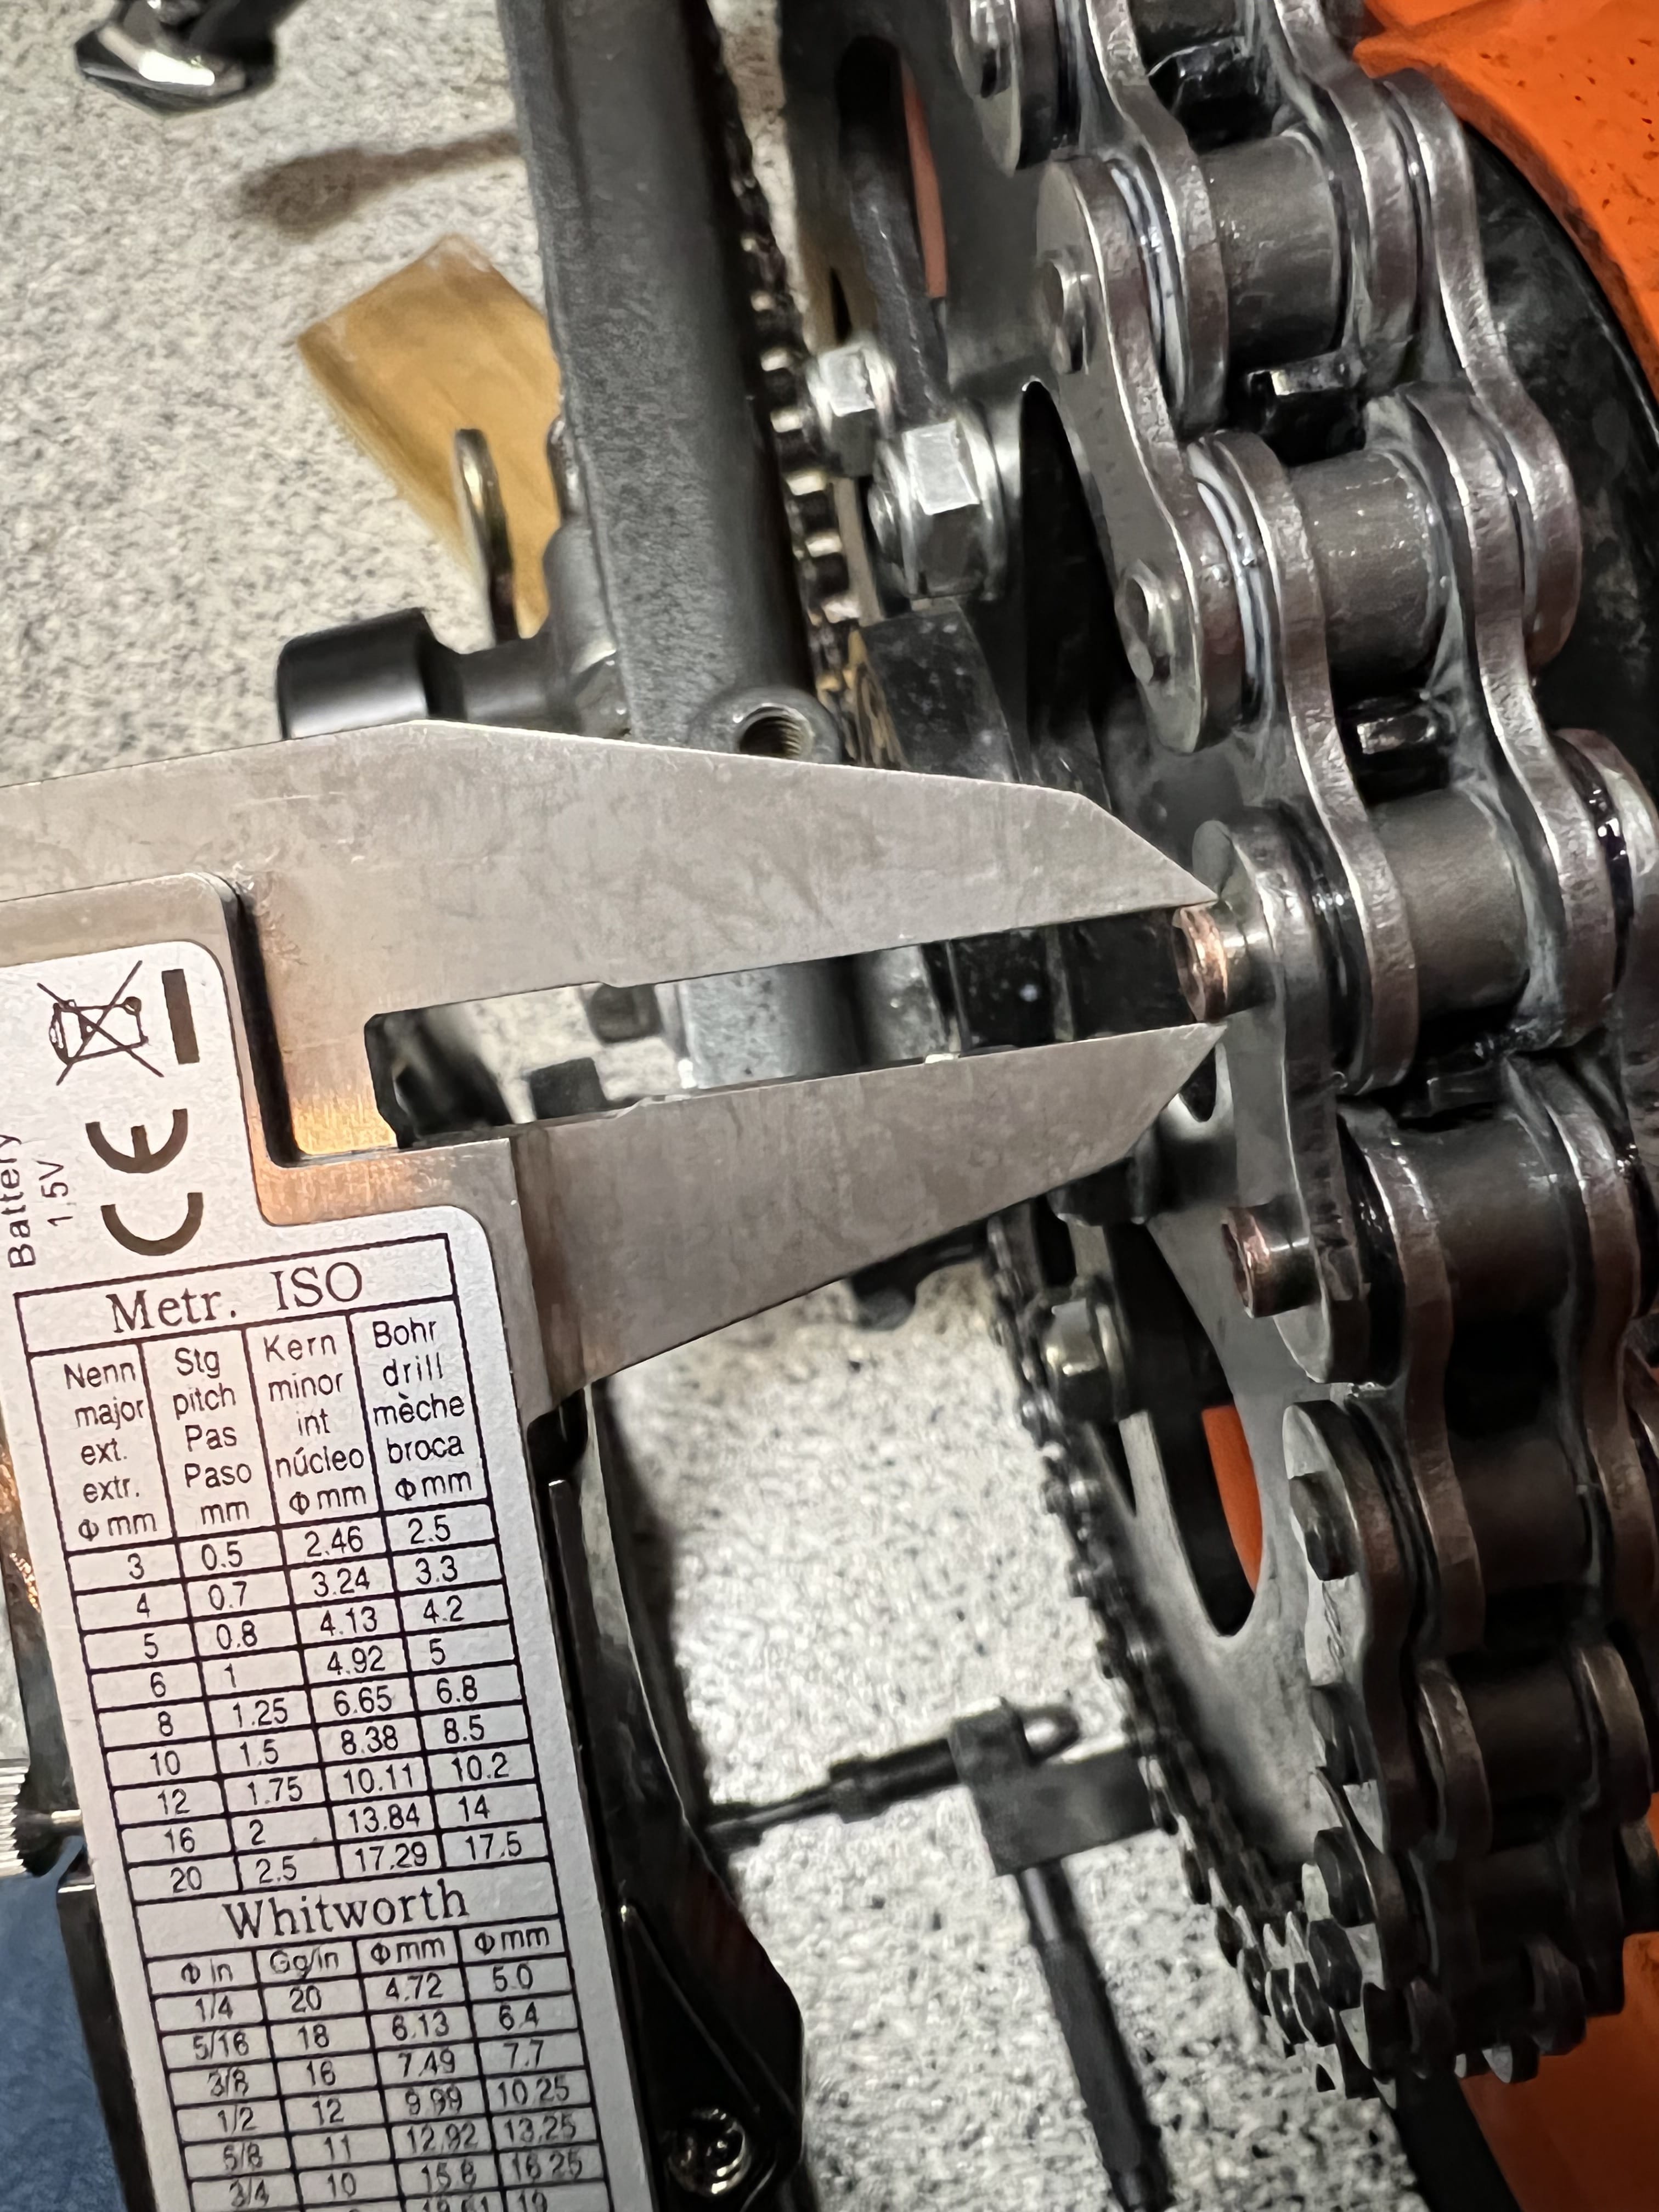
Pressing
No matter if you chose to use a clip type or rivet type master link, the first few steps are the same - starting with the pressing of the side plate onto the master link. Here’s the steps:
- Thoroughly grease the master link pins and o-rings with (the likely provided) grease. This grease will be sealed in for the life of the chain.
- Slide the first pair of greased o-rings onto the pins of the master link
- Attach the master link to the chain, connecting the two ends
- Mount the greased second pair of o-rings onto the master link
- Mount the side plate making sure it is aligned well with the pins
- Press the side plate using a chain press tool
The last step (6) is the tricky one. There are some things to pay attention to:
- Double-check that the side plate is aligned properly with the pins
- Press the side plate bit by bit, checking your progress as you go
- As the pin emerge through the side plate, check that your chain tool is not interfering
⚠️ And perhaps most importantly: ⚠️
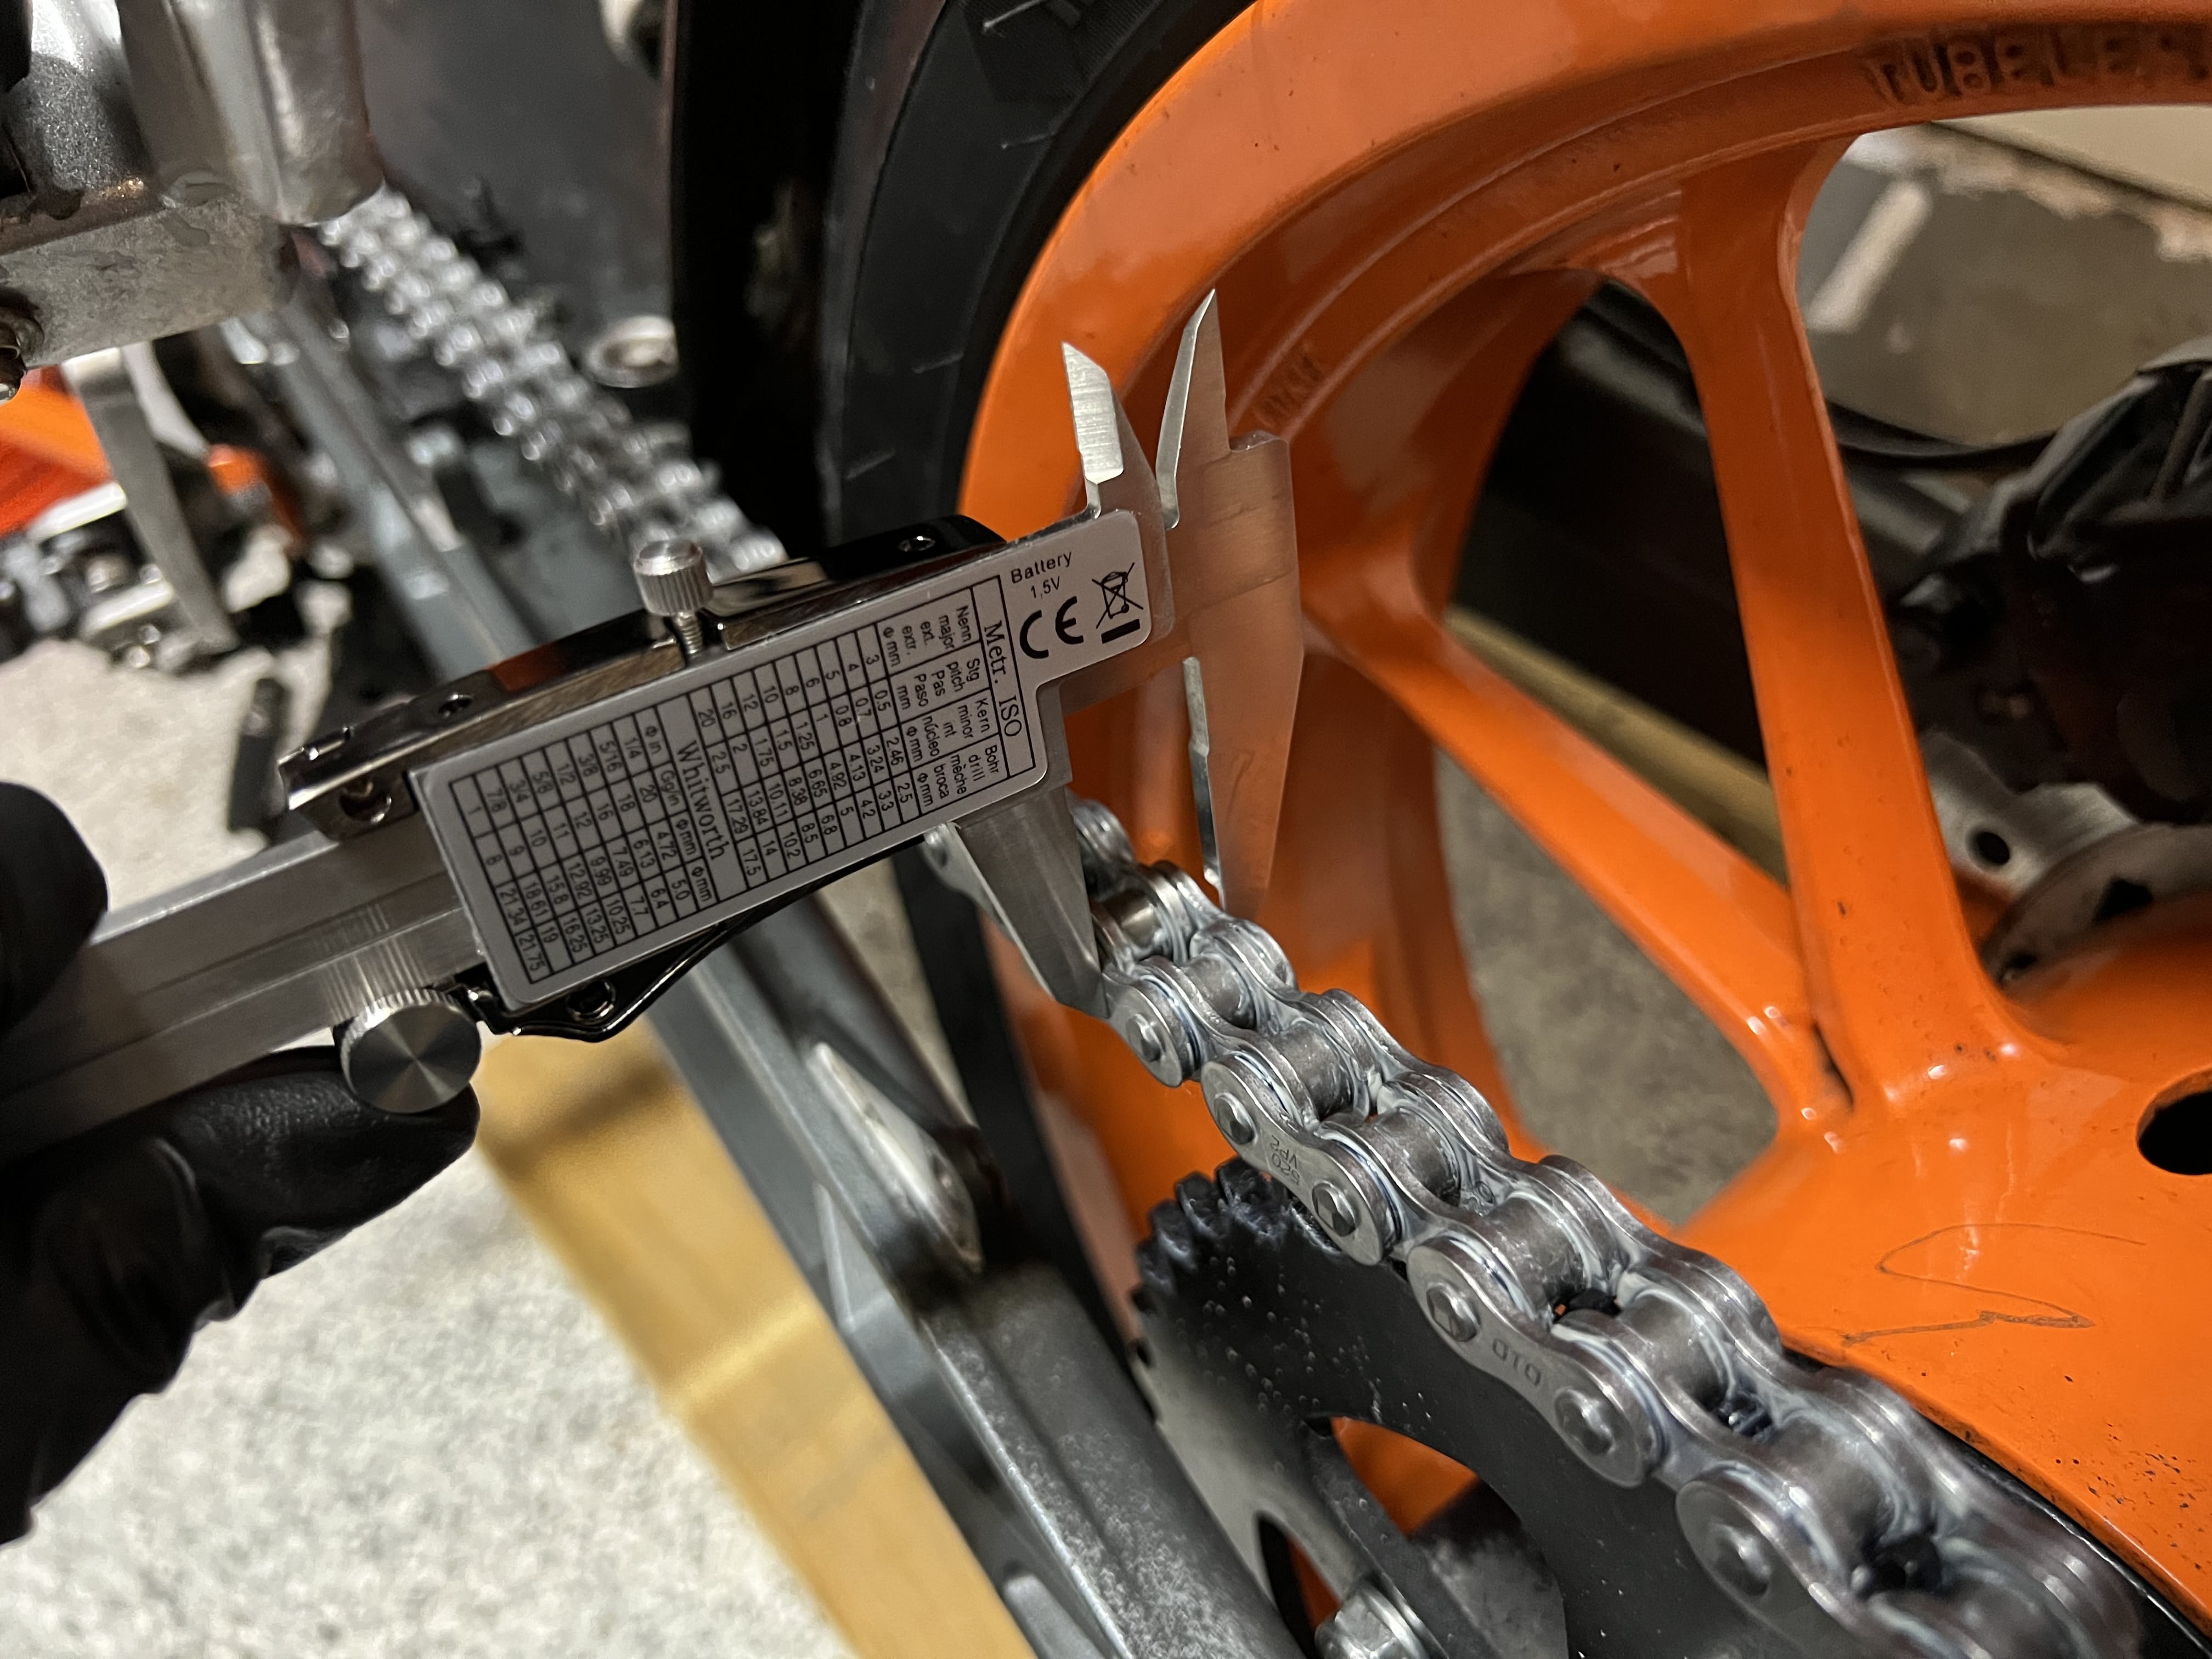
Know the expected width of a link in the chain and only press the master link to meet that width
A too tight master link will be no good as it will have more bending resistance, leading to more heat, wear, and premature failure. Ideally use a precise caliper to measure other links on the chain and only press the side plate enough so the width is within a few tenths of a millimeter of the other links. The closer, the better. Remove your press tool often to check the width.
The pressing will take some effort - if you’re not making progress double check alignment of your tool before applying more force
Metal expands - heat up the side plate to make the pressing effort easier!
Check the alignment of the o-rings on the opposite side of the master link. It should look even.

Riveting
Unlike clip-type master links, where the process pretty much ends at the last step, we have one more thing to do. Riveting is essentially expanding the tips of the pins so that the side plate cannot come off. The master link pins have a dimple that we’ll expand using our tool, which is going to take persistent force.
Once again, it’s very handy to have a caliper. A good rule of thumb is to expand the pins until they are about the same width as the factory riveted ones on the other link on the chain. I switched between the two pins, slowly expanding and measuring each in turn.

It’s also important to check that the chain tool is properly aligned - some chain tools have a dimple on the other side of the riveting press that fits around the factory rivet on the other side of the master link.
11) Chain adjustment & alignment
Congratulations, you’re almost done! The final step of course is adjusting the wheel and chain - you’ll want to ensure using the built-in chain adjusters or a chain alignment tool that the rear wheel is aligned with the front, as well that there is adequate chain slack. Chain slack will differ from bike to bike but it’s always better to have a slightly more loose chain rather than a too tight chain. Some more things to remember:
- As the swing arm compresses, chain slack will reduce (ex. when going over bumps)
- Check chain slack at multiple points along the chain - some spots may be tighter than others!
- A chain alignment tool can come in handy. I like this one
- Tighten/loosen the chain adjusters one quarter rotation at a time
Finally, tighten the chain adjusters and torque the spindle/axle nut.

Conclusion
…And that’s it! Lube the chain and in the next thousand miles check chain slack more often than usual - new chains stretch a little bit early on.
This procedure likely took me several times the amount of time it would take a professional mechanic, but I gained a lot of understanding on how motorcycle chains work. I also now have more confidence in tackling something a little bigger than just oil and filter changes.
The most important thing here is to approach everything slowly and read the directions for your tools and service manual for your motorcycle. If something takes more force than you’re expecting, double check what you’re doing before applying even more force.
The biggest thing I noticed when going from my old and worn chain to the new one is just how much quieter it was. The old chain, even shortly after lubing, made quite a bit of noise. The new chain is significantly quieter even 300 miles after the last lube.